# How to Use Selenium With PowerShell [Tutorial 2026]
> Learn how to use PowerShell with Selenium to scrape the web, interact with web pages via browser automation, and avoid all blocks.
Source: https://www.zenrows.com/blog/selenium-powershell
Selenium is a popular choice for web scraping and testing via browser automation. These tasks are usually written using scripting languages, such as PowerShell. To harness Selenium's powers when working with PowerShell, the developer community created dedicated bindings.
In this guide, you'll explore the basics of using Selenium WebDriver with PowerShell and then move on to more complex interactions for advanced web scraping. You'll learn how to:
- [Get started with Selenium and PowerShell](#selenium-powershell).
- [Interact with web pages in a browser](#interaction-automation).
- [Avoid getting blocked](#avoid-blocks).
Let's dive in!
## Can You Use Selenium With PowerShell?
Selenium is the most popular headless browser library in the IT community. Its rich and language-consistent API makes it perfect for building browser automation scripts for testing and web scraping.
[PowerShell](https://learn.microsoft.com/en-us/powershell/) is a powerful command shell available on both Windows client and server. Browser automation goes hand in hand with scripting, so the developer community created [`selenium-powershell`](https://github.com/adamdriscoll/selenium-powershell), a port of Selenium WebDriver for PowerShell.
Even though the library is currently looking for maintainers, it remains the go-to module for web automation in PowerShell.
Note: If you need to brush up on the basics before jumping into this Selenium PowerShell tutorial, read our guides on [headless browser scraping](/blog/headless-browser-scraping) and [web scraping with PowerShell](/blog/powershell-scraping).
## Web Scraping Tutorial: Selenium With PowerShell
This section will walk you through the first steps of using the PowerShell Selenium module. You'll build an automated scraping script that targets the [infinite scrolling demo](https://scrapingclub.com/exercise/list_infinite_scroll/) below:
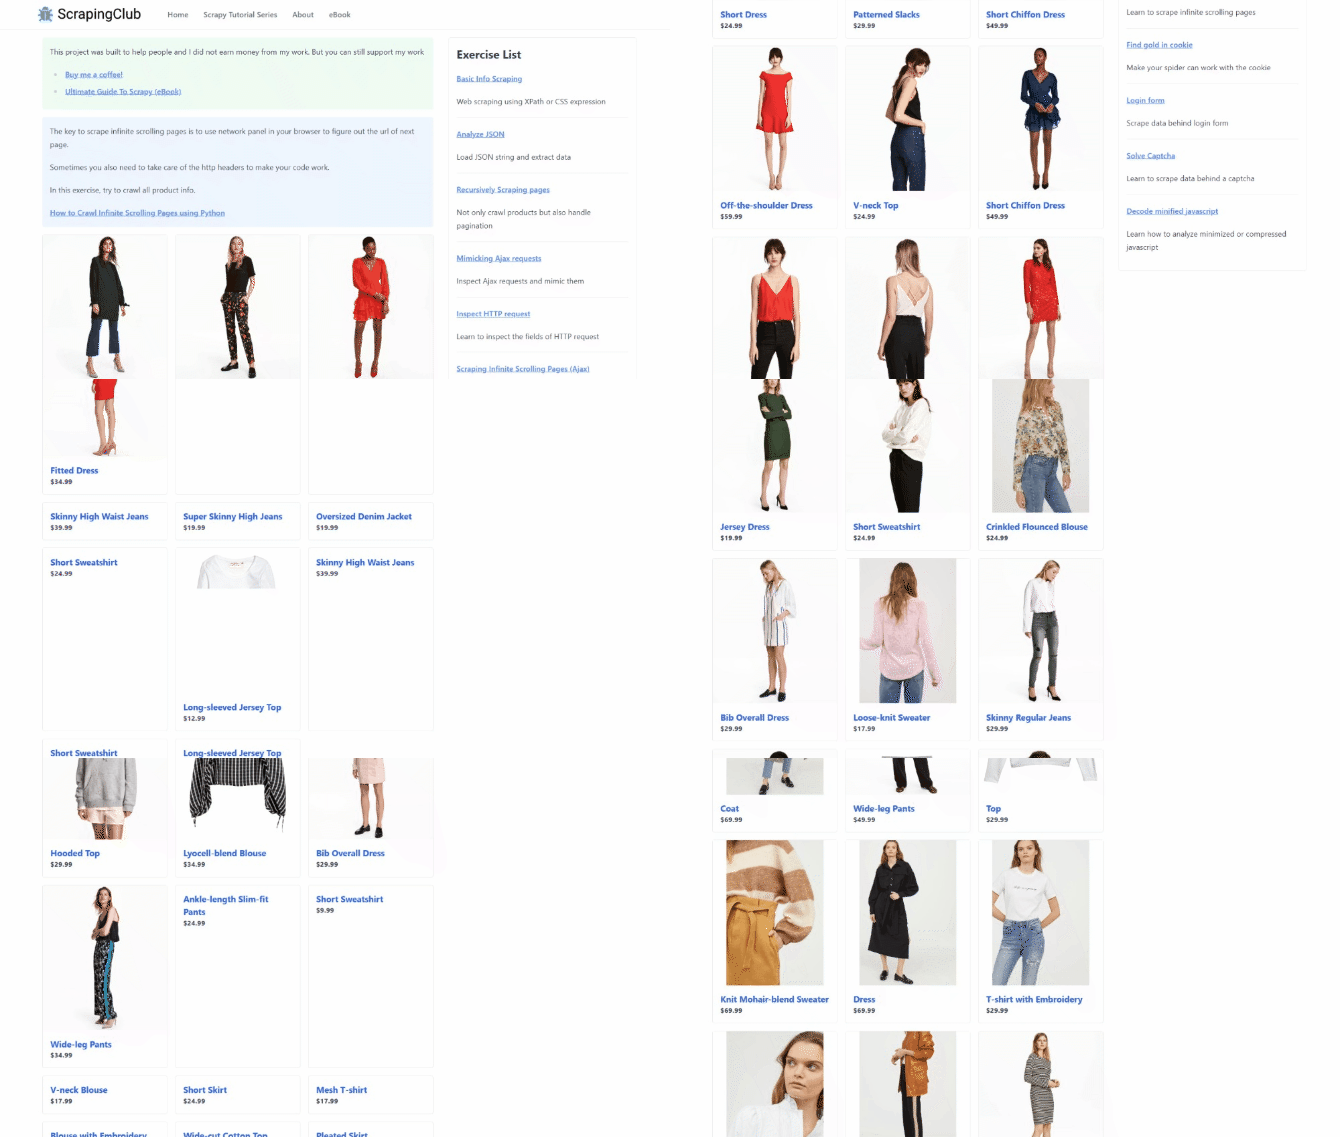
This dynamic content page loads new products via AJAX as the user scrolls down. To interact with it, you must use a browser automation tool that can execute JavaScript, such as Selenium.
Follow the steps below to learn how to retrieve data from this page.
> **Skip the blocks.** [Try Zenrows free](/) and get clean web data without the anti-bot fight.
### Step 1: Install selenium-powershell
Before you start, make sure you have PowerShell Core installed on your computer. [Download the installer](https://learn.microsoft.com/en-us/powershell/scripting/install/installing-powershell?view=powershell-7.4), execute it, and follow the instructions.
> **Info**
>
> The latest versions of Windows come with a special version of PowerShell preinstalled, [Windows PowerShell](https://learn.microsoft.com/en-us/powershell/scripting/whats-new/differences-from-windows-powershell?view=powershell-7.4). It's different from PowerShell Core, so follow the installation procedure even if you are on Windows.
You now have everything you need to set up a Selenium PowerShell project. Open a PowerShell 7 terminal, create a `PowerShellSeleniumScraper` folder, and enter:
```nginx
mkdir PowerShellSeleniumScraper
cd PowerShellSeleniumScraper
```
Load the project folder in your favorite PowerShell IDE, such as [Visual Studio Code with the PowerShell extension](https://code.visualstudio.com/docs/languages/powershell).
Create a `scraper.ps1` script inside the directory. This is where you'll place your browser automation scraping logic.
Then, open your IDE's terminal. Launch the command below to install the PowerShell [`Selenium`](https://github.com/adamdriscoll/selenium-powershell) module. The package name of the `selenium-powershell` repository is:
```nginx
Install-Module -Name Selenium
```
Import `Selenium` with the following line in `scraper.ps1`:
```nginx
Install-Module -Name Selenium
```
To control a Chrome instance, `selenium-powershell` uses a Chrome WebDriver.
At the time of writing this article, the library's last update was in 2020. So, the included built-in driver may no longer work with newer versions of Chrome.
Address that by downloading the right version of Chrome WebDriver from the [official site](https://googlechromelabs.github.io/chrome-for-testing/). Unzip it and place the driver executable in the project folder. You'll need it later in this tutorial.
Keep in mind that you can run your PowerShell script with the following command:
```nginx
./scraper.ps1
```
Well done! You're ready to start scraping some data with Selenium and PowerShell.
### Step 2: Scrape the Whole Page With Selenium
Use this line to start a PowerShell Selenium WebDriver instance to control Chrome. Specify the `-WebDriverDirectory` option to set the directory containing your driver executable:
```nginx
$Driver = Start-SeChrome -WebDriverDirectory './' -Headless # -> comment out while developing locally
```
> **Info**
>
> The `-Headless` argument instructs Selenium to launch Chrome in headless mode. Comment on that option to see the actions made by your scraping script in the browser window.
Next, open the target page in the controlled Chrome instance with the `Enter-SeUrl` command:
```nginx
Enter-SeUrl 'https://scrapingclub.com/exercise/list_infinite_scroll/' -Driver $Driver
```
Access the page source HTML via the `PageSource` attribute:
```nginx
$Html = $Driver.PageSource
```
Print it with:
```nginx
$Html
```
Don't forget to close Selenium and release its resources:
```nginx
Stop-SeDriver -Driver $Driver
```
This is what your `scraper.ps1` script should contain:
```nginx
Import-Module -Name Selenium
# initialize a Selenium WebDriver instance to control Chrome
$Driver = Start-SeChrome -WebDriverDirectory './' -Headless # -> comment out while developing locally
# visit the target page in the browser
Enter-SeUrl 'https://scrapingclub.com/exercise/list_infinite_scroll/' -Driver $Driver
# retrieve the page source code and print it
$Html = $Driver.PageSource
$Html
# close the browser and release its resources
Stop-SeDriver -Driver $Driver
```
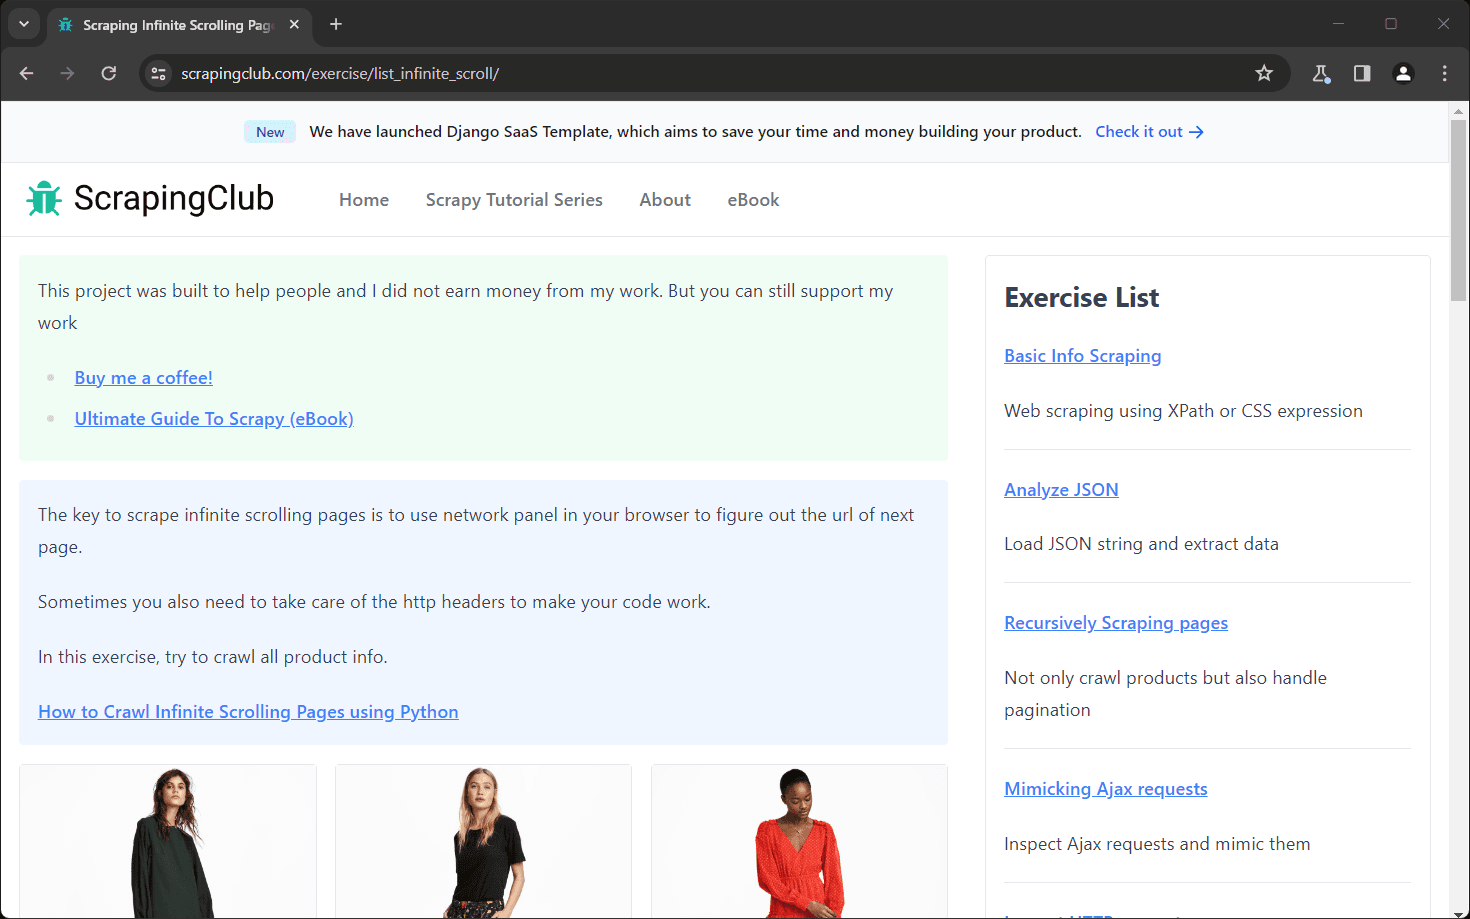
Run the script in headed mode by commenting on the `-Headless` argument. Selenium will open a Chrome window and visit the desired Infinite Scrolling demo page:
> **Info**
>
> The "Chrome is being controlled by automated test software" message indicates that Selenium is operating on Chrome.
Before terminating, the script will print the content below in PowerShell:
```html
Scraping Infinite Scrolling Pages (Ajax) | ScrapingClub
```
Awesome! That's exactly the HTML code of the target page. Learn how to extract data from it in the next step.
### Step 3: Extract the Data You Want
The Selenium PowerShell module can parse the HTML content of a dynamic page. It provides a complete API for extracting data from the nodes in the DOM.
Assume that your main [web scraping](/) goal is to retrieve the name and price of each product on the page. You can achieve that with the following three-step procedure:
1. Select the product HTML nodes with an effective DOM selection strategy.
2. Collect the right information from each of them.
3. Store the scraped data in a PowerShell custom data structure.
A DOM selection strategy generally relies on [CSS selectors](https://developer.mozilla.org/en-US/docs/Learn/CSS/Building_blocks/Selectors) or [XPath](/blog/xpath-web-scraping) expressions, two of the most popular ways to select HTML elements. CSS selectors are simpler and more intuitive, while XPath is more flexible but complex. Find out more in our comparison of [CSS Selector vs XPath](/blog/xpath-vs-css-selector).
Let's keep things simple and opt for CSS selectors. Before devising an effective CSS selector, you need to perform a preliminary task. Open the target page in your browser and inspect a product HTML node with DevTools:
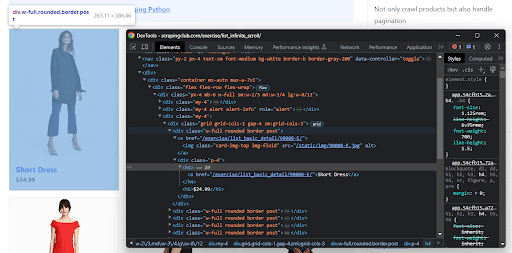
Expand the HTML code and see how each product is a `
` element with a `"post"` class. The product name is in an inner `
` element, while the price is in an `
` node.
You now know that `.post` is the CSS selector to retrieve the product's HTML elements. Given a product card, you can get the name and price elements with the CSS selectors `h4` and `h5`, respectively. Here's how to do it for your target page.
First, you need a custom data structure to store the scraped data. Since the page contains several products, an array of [`PSCustomObject`](https://learn.microsoft.com/en-us/powershell/scripting/learn/deep-dives/everything-about-pscustomobject?view=powershell-7.4) is the best solution:
```nginx
$Products = New-Object Collections.Generic.List[PSCustomObject]
```
Use the [`Get-SeElement`](https://github.com/adamdriscoll/selenium-powershell/blob/master/Help/Get-SeElement.md) command to select the product HTML elements on the page. Thanks to `-By 'CssSelector'`, Selenium will apply a CSS selector on the DOM:
```nginx
$ProductHTMLElements = Get-SeElement -Driver $Driver -By 'CssSelector' '.post'
```
After getting the product nodes, iterate over them and perform the data scraping logic:
```nginx
foreach ($ProductHTMLElement in $ProductHTMLElements) {
# select the name and price elements
$NameElement = Get-SeElement -Element $ProductHTMLElement -By 'CssSelector' 'h4'
$PriceElement = Get-SeElement -Element $ProductHTMLElement -By 'CssSelector' 'h5'
# extract the desired data from the selected nodes
$Name = $NameElement.Text
$Price = $PriceElement.Text
# create an object containing the scraped
# data and add it to the list
$Product = [PSCustomObject] @{
'Name' = $Name
'Price'= $Price
}
$Products.Add($Product)
}
```
The `-Element` argument in `Get-SeElement` restricts the node search to the child nodes of the specified element. Given an HTML element, the Text attribute returns its text. That's all you need to extract the data you need.
Log `$Products` to see if the PowerShell Selenium web scraping logic works as intended:
```nginx
$Products
```
This is the current `scraper.ps1` file:
```nginx
Import-Module -Name Selenium
# initialize a Selenium WebDriver instance to control Chrome
$Driver = Start-SeChrome -WebDriverDirectory './' -Headless # -> comment out while developing locally
# visit the target page in the browser
Enter-SeUrl 'https://scrapingclub.com/exercise/list_infinite_scroll/' -Driver $Driver
# where to store the scraped data
$Products = New-Object Collections.Generic.List[PSCustomObject]
# select all product cards on the page
$ProductHTMLElements = Get-SeElement -Driver $Driver -By 'CssSelector' '.post'
# iterate over the list of HTML product elements
# and scrape data from them
foreach ($ProductHTMLElement in $ProductHTMLElements) {
# select the name and price elements
$NameElement = Get-SeElement -Element $ProductHTMLElement -By 'CssSelector' 'h4'
$PriceElement = Get-SeElement -Element $ProductHTMLElement -By 'CssSelector' 'h5'
# extract the desired data from the selected nodes
$Name = $NameElement.Text
$Price = $PriceElement.Text
# create an object containing the scraped
# data and add it to the list
$Product = [PSCustomObject] @{
'Name' = $Name
'Price'= $Price
}
$Products.Add($Product)
}
# log the scraped data
$Products
# close the browser and release its resources
Stop-SeDriver -Driver $Driver
```
Run it, and it'll result in this output:
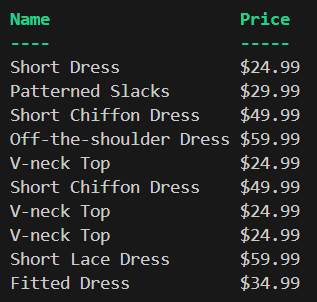
Wonderful! The Selenium WebDriver PowerShell parsing logic works like a charm. Now, you need to export the collected data into a more readable format, such as CSV.
### Step 4: Export Data as CSV
PowerShell provides the [`Export-Csv`](https://learn.microsoft.com/en-us/powershell/module/microsoft.powershell.utility/export-csv?view=powershell-7.4) utility to convert an array into CSV and export it to a file. Call it to create a CSV output file called `products.csv` and populate it with the collected data:
```nginx
$Products | Export-Csv -LiteralPath ".\products.csv"
```
Put it all together, and you’ll get:
```nginx
Import-Module -Name Selenium
# initialize a Selenium WebDriver instance to control Chrome
$Driver = Start-SeChrome -WebDriverDirectory './' -Headless # -> comment out while developing locally
# visit the target page in the browser
Enter-SeUrl 'https://scrapingclub.com/exercise/list_infinite_scroll/' -Driver $Driver
# where to store the scraped data
$Products = New-Object Collections.Generic.List[PSCustomObject]
# select all product cards on the page
$ProductHTMLElements = Get-SeElement -Driver $Driver -By 'CssSelector' '.post'
# iterate over the list of HTML product elements
# and scrape data from them
foreach ($ProductHTMLElement in $ProductHTMLElements) {
# select the name and price elements
$NameElement = Get-SeElement -Element $ProductHTMLElement -By 'CssSelector' 'h4'
$PriceElement = Get-SeElement -Element $ProductHTMLElement -By 'CssSelector' 'h5'
# extract the desired data from the selected nodes
$Name = $NameElement.Text
$Price = $PriceElement.Text
# create an object containing the scraped
# data and add it to the list
$Product = [PSCustomObject] @{
'Name' = $Name
'Price'= $Price
}
$Products.Add($Product)
}
# export the scraped data to CSV
$Products | Export-Csv -LiteralPath ".\products.csv"
# close the browser and release its resources
Stop-SeDriver -Driver $Driver
```
Launch the scraping script:
```nginx
./scraper.ps1
```
[Selenium may be slow](/blog/selenium-slow), so the script execution will take a while. When the execution terminates, a `products.csv` file will appear in your project's folder. Open it, and you'll see the following data:
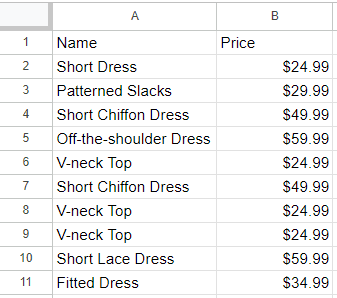
Fantastic! You now know the basics of using Selenium with PowerShell.
However, you'll need to do much more to scrape the whole site. The current output includes only ten rows because the page initially loads just a few products. The rest of them are loaded with infinite scrolling.
In the next section, you'll learn how to deal with infinite scrolling to scrape all the products!
## Interactions With Web Pages via Browser Automation
The Selenium PowerShell module supports the automation of many user interactions, including mouse movements, waits, keyboard actions, and more. This simulation of human behavior in your script allows you to:
1. Access content that requires dynamic user interaction.
2. Convince [anti-bot](/blog/anti-bot) measures that your bot is a human user.
The most relevant interactions supported by the Selenium WebDriver PowerShell package are:
- Waiting for elements to appear on the page.
- Mouse movements.
- Click actions.
- Keyboard actions.
- Scrolling up or down the page.
- Filling out input fields.
- Submitting forms.
- Taking screenshots of the entire page.
Most of the operations above are available via built-in commands. For the remaining interactions, use `ExecuteScript()` from the driver object. This method takes a JavaScript script as an argument and runs it on the page to reproduce an action.
In the next section, you'll learn how to scrape all product cards in the [infinite scroll demo page](https://scrapingclub.com/exercise/list_infinite_scroll/). Then, you'll explore other popular interactions in more specific PowerShell Selenium example snippets!
### Scrolling
After loading, the target page contains only ten product cards. To see more, the user needs to scroll down until the end.
The Selenium PowerShell module lacks a built-in method for scrolling down. That's why you need a custom JavaScript script to simulate infinite scrolling.
This JavaScript snippet instructs the browser to scroll down the page 10 times at an interval of 500 ms:
```js
// scroll down the page 10 times
const scrolls = 10
let scrollCount = 0
// scroll down and then wait for 0.5s
const scrollInterval = setInterval(() => {
window.scrollTo(0, document.body.scrollHeight)
scrollCount++
if (scrollCount === numScrolls) {
clearInterval(scrollInterval)
}
}, 500)
```
Store it in a string variable and pass it to `ExecuteScript()` before selecting the product nodes:
```nginx
$ScrollingScript = @'
// scroll down the page 10 times
const scrolls = 10
let scrollCount = 0
// scroll down and then wait for 0.5s
const scrollInterval = setInterval(() => {
window.scrollTo(0, document.body.scrollHeight)
scrollCount++
if (scrollCount === scrolls) {
clearInterval(scrollInterval)
}
}, 500)
'@
$Driver.ExecuteScript($ScrollingScript)
```
Executing the JS script takes time, so you must wait for the operation to end. Use [`Start-Sleep`](https://learn.microsoft.com/en-us/powershell/module/microsoft.powershell.utility/start-sleep?view=powershell-7.4) to stop the script execution for 10 seconds. This action will enable the Selenium PowerShell module to wait for new products to be loaded in the DOM:
```nginx
Start-Sleep -Seconds 10
```
Your `scraper.ps1` file will now contain the following browser automation logic:
```nginx
Import-Module -Name Selenium
# initialize a Selenium WebDriver instance to control Chrome
$Driver = Start-SeChrome -WebDriverDirectory './' -Headless # -> comment out while developing locally
# visit the target page in the browser
Enter-SeUrl 'https://scrapingclub.com/exercise/list_infinite_scroll/' -Driver $Driver
# where to store the scraped data
$Products = New-Object Collections.Generic.List[PSCustomObject]
# JS custom logic to scroll down the page a few times
$ScrollingScript = @'
// scroll down the page 10 times
const scrolls = 10
let scrollCount = 0
// scroll down and then wait for 0.5s
const scrollInterval = setInterval(() => {
window.scrollTo(0, document.body.scrollHeight)
scrollCount++
if (scrollCount === scrolls) {
clearInterval(scrollInterval)
}
}, 500)
'@
# run the custom JS script on the page
$Driver.ExecuteScript($ScrollingScript)
# wait for the products to load
Start-Sleep -Seconds 10
# select all product cards on the page
$ProductHTMLElements = Get-SeElement -Driver $Driver -By 'CssSelector' '.post'
# iterate over the list of HTML product elements
# and scrape data from them
foreach ($ProductHTMLElement in $ProductHTMLElements) {
# select the name and price elements
$NameElement = Get-SeElement -Element $ProductHTMLElement -By 'CssSelector' 'h4'
$PriceElement = Get-SeElement -Element $ProductHTMLElement -By 'CssSelector' 'h5'
# extract the desired data from the selected nodes
$Name = $NameElement.Text
$Price = $PriceElement.Text
# create an object containing the scraped
# data and add it to the list
$Product = [PSCustomObject] @{
'Name' = $Name
'Price'= $Price
}
$Products.Add($Product)
}
# export the scraped data to CSV
$Products | Export-Csv -LiteralPath ".\products.csv"
# close the browser and release its resources
Stop-SeDriver -Driver $Driver
```
This time, the output CSV should store all 60 products on the site. Run the script to verify it:
```nginx
./scraper.ps1
```
Be patient. Executing the script will take more than 10 seconds because of the `Start-Sleep` instruction.
The new `products.csv` file will now have more than just ten records:
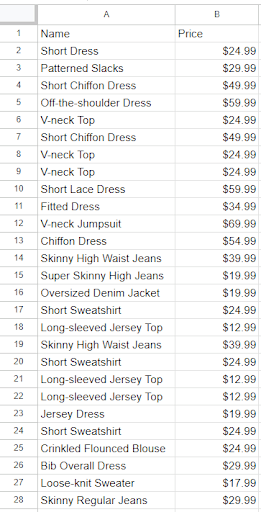
Here we go! You just scraped all products on the target page.
### Wait for Element
The current PowerShell Selenium example script relies on a hard wait, which may fail in some cases and is generally considered bad practice for web scraping.
The script will malfunction during random browser or network slowdowns. Additionally, hard waits are one of the main reasons for flaky automation logic, and they make browser automation scraping scripts unnecessarily slow. You should never use them in production.
Go with smart waits rather than hard waits to achieve consistent results. The idea of smart waits is to wait for a given DOM node to appear on the page before interacting with it instead of waiting for a fixed number of seconds every time.
The `Find-SeElement` command from the Selenium PowerShell module can wait for a specific element to be on the page before selecting it. Use it to wait up to 10 seconds for the 60th .post element to be on the DOM:
```nginx
Find-SeElement -Driver $Driver -Wait -Timeout 10 -CssSelector '.post:nth-child(60)' | Out-Null
```
Ignore the result of `Find-SeElement` by concatenating it with [`Out-Null`](https://learn.microsoft.com/en-us/powershell/module/microsoft.powershell.core/out-null?view=powershell-7.4). Replace the `Start-Sleep` instruction hard wait instruction with the line above. The script will now automatically wait for the products to be on the page.
The definitive code of your Selenium WebDriver PowerShell scraper will be:
```nginx
Import-Module -Name Selenium
# initialize a Selenium WebDriver instance to control Chrome
$Driver = Start-SeChrome -WebDriverDirectory './' -Headless # -> comment out while developing locally
# visit the target page in the browser
Enter-SeUrl 'https://scrapingclub.com/exercise/list_infinite_scroll/' -Driver $Driver
# where to store the scraped data
$Products = New-Object Collections.Generic.List[PSCustomObject]
# JS custom logic to scroll down the page a few times
$ScrollingScript = @'
// scroll down the page 10 times
const scrolls = 10
let scrollCount = 0
// scroll down and then wait for 0.5s
const scrollInterval = setInterval(() => {
window.scrollTo(0, document.body.scrollHeight)
scrollCount++
if (scrollCount === scrolls) {
clearInterval(scrollInterval)
}
}, 500)
'@
# run the custom JS script on the page
$Driver.ExecuteScript($ScrollingScript)
# wait up to 10 seconds for the 60th element to be on the page
Find-SeElement -Driver $Driver -Wait -Timeout 10 -CssSelector '.post:nth-child(60)' | Out-Null
# select all product cards on the page
$ProductHTMLElements = Get-SeElement -Driver $Driver -By 'CssSelector' '.post'
# iterate over the list of HTML product elements
# and scrape data from them
foreach ($ProductHTMLElement in $ProductHTMLElements) {
# select the name and price elements
$NameElement = Get-SeElement -Element $ProductHTMLElement -By 'CssSelector' 'h4'
$PriceElement = Get-SeElement -Element $ProductHTMLElement -By 'CssSelector' 'h5'
# extract the desired data from the selected nodes
$Name = $NameElement.Text
$Price = $PriceElement.Text
# create an object containing the scraped
# data and add it to the list
$Product = [PSCustomObject] @{
'Name' = $Name
'Price'= $Price
}
$Products.Add($Product)
}
# export the scraped data to CSV
$Products | Export-Csv -LiteralPath '.\products.csv'
# close the browser and release its resources
Stop-SeDriver -Driver $Driver
```
Launch it, and you'll notice it produces the same results. Congratulations!
### Wait for Page to Load
`Enter-SeUrl` automatically waits for the page to load, so you don't have to worry about adding an extra check before interacting with the elements on the page.
However, modern pages execute a lot of JavaScript in the client. This dynamically changes the DOM of the page and retrieves new data via AJAX. So, telling when a page has fully loaded is a complex task.
The [`v4.0.0.0-preview1`](https://github.com/adamdriscoll/selenium-powershell/releases/tag/v4.0.0-preview1) version of the PowerShell Selenium library introduced [`Wait-SeDriver`](https://github.com/adamdriscoll/selenium-powershell/blob/master/Help/Wait-SeDriver.md) and [`Wait-SeElement`](https://github.com/adamdriscoll/selenium-powershell/blob/master/Help/Wait-SeElement.md). These two commands enable you to wait until expected conditions occur on the page.
For example, you can wait up to a given number of seconds for a specific element to be visible, stale, present, and so on. This mechanism allows you to determine the current page's state.
### Click Elements
The elements selected via `selenium-powershell` include the `Click()` method. It tells the browser to click on the specified element, triggering a mouse click event:
```nginx
$Element.Click()
```
When `Click()` triggers a page change, the browser will load a new page (like in the example below). In this case, you have to adapt your scraping logic to the new structure of the DOM:
```nginx
$ProductElement = Get-SeElement -Driver $Driver -By 'CssSelector' ':nth-child(1)'
$ProductElement.Click();
# you are now on the detail product page...
# new scraping logic...
# Get-SeElement -Driver $Driver ...
```
### Take a Screenshot
Scraping data from the Web isn't only about extracting textual info from a site. Images are useful, too! For example, screenshots of competitors' pages can help businesses study their approach to marketing, communication, and UI development.
Selenium provides screenshotting functionality via the [`New-SeScreenshot`](https://github.com/adamdriscoll/selenium-powershell/blob/master/Help/New-SeScreenshot.md) command:
```nginx
New-SeScreenshot -Driver $Driver -Path './image.png'
```
An `image.png` file containing the screenshot of the current viewport will appear in the root folder of your project.
## Avoid Getting Blocked When Scraping With Selenium PowerShell
One of the biggest challenges to web scraping via browser automation is anti-bot tools. They implement a set of measures to detect and block automated scripts.
An effective approach to [web scraping without getting blocked](/blog/web-scraping-without-getting-blocked) is to randomize requests. The idea is to make your requests appear more natural by setting real-world User-Agent values and using proxies to change the exit IP.\
Set a custom User Agent in Selenium by passing it to Chrome's `--user-agent` flag option:
```nginx
$CustomUserAgent = 'Mozilla/5.0 (Windows NT 10.0; Win64; x64) AppleWebKit/537.36 (KHTML, like Gecko) Chrome/124.0.0.0 Safari/537.36'
$Driver = Start-SeChrome -Arguments @('user-agent=' + $($CustomUserAgent)) -WebDriverDirectory './'
```
Wondering why that's important? Find out more in our guide on [User Agents for web scraping](/blog/user-agent-web-scraping).
Configuring a proxy follows a similar pattern. It requires the `--proxy-server` flag. To see how it works, get a free proxy URL from a site such as [Free Proxy List](https://free-proxy-list.net/) and then set it up in Chrome via Selenium:
```nginx
$ProxyUrl= '213.31.4.48:8080'
$Driver = Start-SeChrome -Arguments @('proxy-server=' + $($ProxyUrl)) -WebDriverDirectory './'
```
However, keep in mind that free proxies are short-lived and unreliable. Use them only for learning purposes and never in production.
> **Info**
>
> `-Arguments` accepts a list of flags, meaning you can configure a proxy server and a custom User Agent.
Keep in mind that these two approaches are just baby steps to bypassing anti-bot systems. Sophisticated Web Application Firewalls (WAFs) like [Cloudflare](/blog/bypass-cloudflare), [Akamai](/blog/bypass-akamai), [DataDome](/blog/datadome-bypass), [PerimeterX](/blog/perimeterx-bypass), and others can still detect your script as a bot.
Here's what will happen if you try to scrape a Cloudflare-protected site, such as G2:
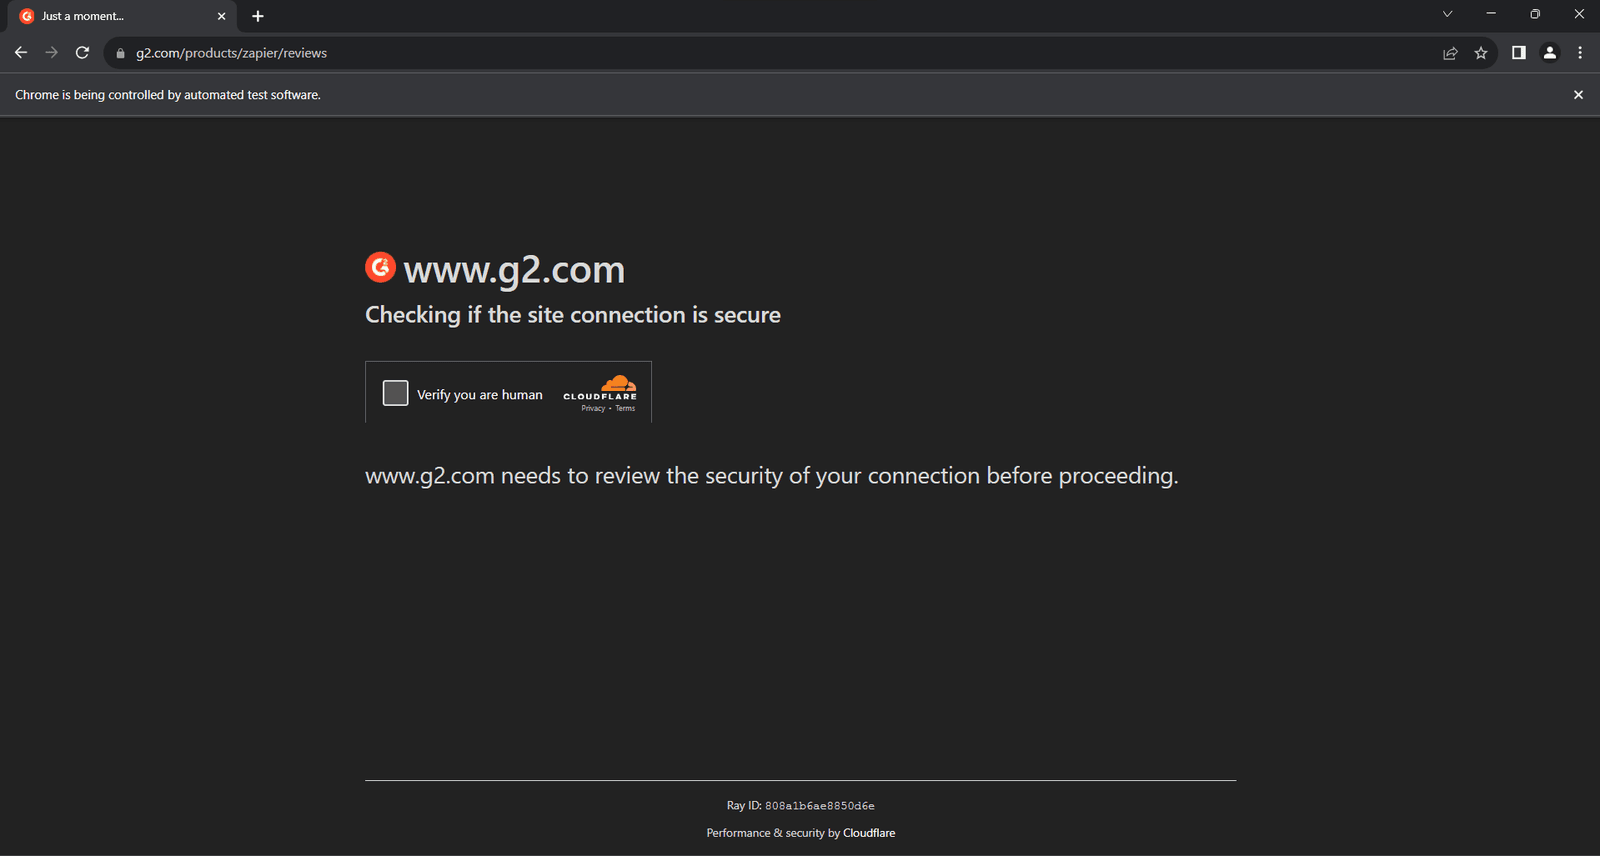
Does it mean you need to give up? Not at all. The solution to this hurdle is a good web scraping API. It will integrate seamlessly with Selenium and save you from IP blocks and bans. An example of such a toolkit is [Zenrows](/).
Here's how to boost Selenium PowerShell with Zenrows:
[Sign up for free](/), redeem your first 1,000 credits, and reach the Request Builder page.
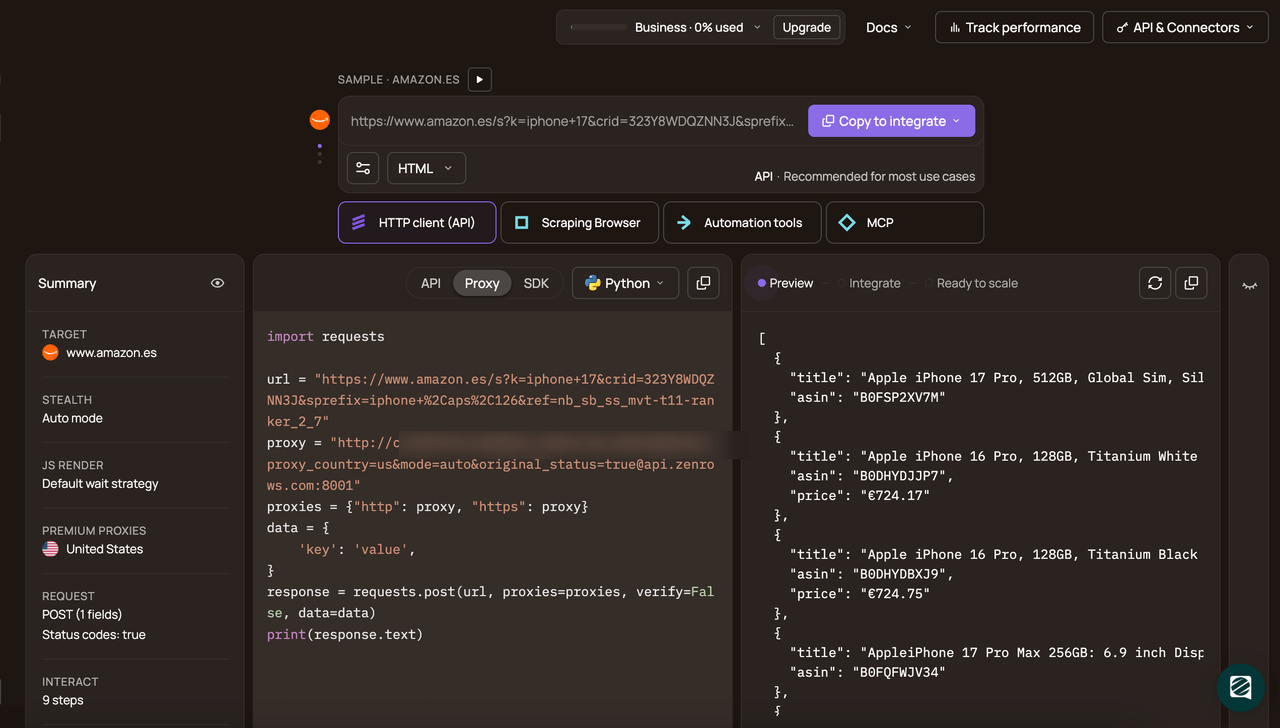
Assuming you want to extract data from the [Cloudflare-protected page presented earlier](https://www.g2.com/products/airtable/reviews), here's what you need to do:
1. Paste your target URL (`https://www.g2.com/products/airtable/reviews`) in the "URL to Scrape" field.
2. Enable JS Rendering (User-Agent rotation and the anti-bot bypass tools are included by default).
3. Enable the rotating IPs by clicking the "Premium Proxy" check.
4. On the right side of the screen, press the "cURL" button and select the "API" option.
Copy the generated URL and use it in your code in the `Enter-SeUrl` command:
```nginx
Import-Module -Name Selenium
# initialize a Selenium WebDriver instance to control Chrome
$Driver = Start-SeChrome -WebDriverDirectory './' -Headless # -> comment out while developing locally
# visit the target page in the browser
Enter-SeUrl 'https://api.zenrows.com/v1/?apikey=&url=https%3A%2F%2Fwww.g2.com%2Fproducts%2Fairtable%2Freviews&js_render=true&premium_proxy=true' -Driver $Driver
# retrieve the page source code and print it
$Html = $Driver.PageSource
$Html
# close the browser and release its resources
Stop-SeDriver -Driver $Driver
```
Launch it, and it'll print the source HTML of the desired page:
```html
Airtable Reviews 2024: Details, Pricing, & Features | G2
```
You've just integrated Zenrows into Selenium with PowerShell.
**And here's more good news: when you use Zenrows, you no longer need Selenium at all**. Zenrows provides Selenium-equivalent JavaScript rendering capabilities, so it's all you need to scrape the web successfully.
To replace Selenium, activate the "JS Rendering" feature in the Request Builder and call the target URL using any HTTP client. Enjoy the anti-bot system bypass to the fullest!
## Conclusion
In this tutorial, you explored the fundamentals of controlling headless Chrome in PowerShell. You learned the basics of Selenium and then dived into more advanced techniques. Now, you're a PowerShell browser automation expert!
No matter how complex your browser automation is, anti-bot measures can still block it. Bypass them all using Zenrows, a next-generation web scraping API with browser automation capabilities, IP rotation, and everything you need to avoid blocks and bans. Scraping dynamic content sites has never been easier. [Try Zenrows for free!](/)