How to Integrate Puppeteer with ZenRows
Puppeteer is the most popular headless browser library in JavaScript, but anti-bot solutions can easily detect it and prevent it from accessing web pages. Avoid that limitation with a ZenRows Puppeteer integration!
This tutorial will cover:
Option 1: Use ZenRows’ Proxies in Puppeteer to Avoid Blocks
ZenRows offers premium proxies in 195+ countries that auto-rotate the IP address for you, as well as the User-Agent header. Integrate them into Puppeteer to appear every time as a different user so that your chances of getting blocked are reduced exponentially.
The target site of this tutorial section will be httpbin.io/get, an endpoint that returns the origin IP and headers of the incoming request. You’ll use it to verify ZenRows works.
Let’s assume you have an initial Puppeteer script. It connects to a site in headless Chromium and extracts the content of the page from it (in this case, a JSON response produced by the API endpoint).
import puppeteer from "puppeteer";

(async () => {
    // launch Chromium in headless mode
    // and open a new blank page
    const browser = await puppeteer.launch();
    const page = await browser.newPage();

    // visit the target URL
    await page.goto("https://httpbin.io/get");

    // retrieve the page content and log it
    const body = await page.waitForSelector("body");
    const response = await body.getProperty("textContent");
    const jsonResponse = await response.jsonValue();
    console.log(jsonResponse);

    await browser.close();
})();
Follow the steps below to integrate ZenRows premium proxies into this scraper!
Step 1: Sign Up for ZenRows
Create a ZenRows account to get your API key. You’ll also receive 1,000 free API credits and gain access to a 24/7 support chat with our experienced engineers.
If you already have an account, use your credentials to log in.
Step 2: Generate Your Premium Proxy Endpoint
After logging in, you’ll get redirect to the Request Builder page:
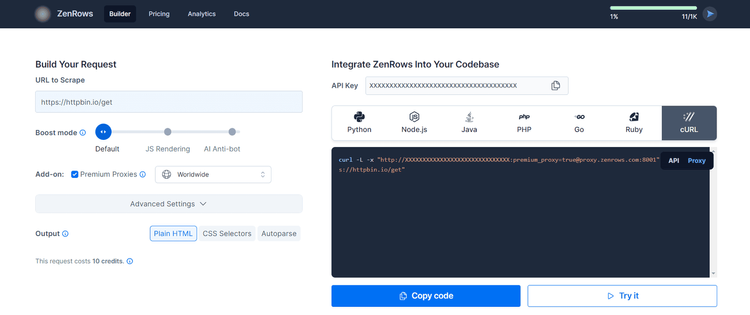
Paste your target URL (https://httpbin.io/get), and check the Premium Proxies option. Then, on the right, select “cURL” and activate the “Proxy” connection mode to auto-generate your proxy URL.
Now, copy the proxy endpoint (the first URL between quotation marks). As you can verify in the screenshot above, here’s what it should look like:
http://<YOUR_ZENROWS_KEY>:premium_proxy=true@proxy.zenrows.com:8001
It’s time to integrate this ZenRows proxy into Puppeteer!
Step 3: Configure the Proxy in Puppeteer
Since the --proxy-server Chromium flag doesn’t natively support authenticated proxies, add the proxy-chain package to your project’s dependencies:
npm install proxy-chain
Next, import the proxyChain object from the proxy-chain library:
import proxyChain from "proxy-chain";
Then, call the anonymizeProxy() method to start a local proxy you can pass to --proxy-server. Replace <ZENROWS_PREMIUM_PROXY_URL> with the proxy URL generated in the previous step.
const proxyURL = "<ZENROWS_PREMIUM_PROXY_URL>";
const newProxyURL = await proxyChain.anonymizeProxy({ url: proxyURL });
const browser = await puppeteer.launch({
    args: [`--proxy-server=${newProxyURL}`],
});

// scraping logic...

await proxyChain.closeAnonymizedProxy(newProxyURL, true);
Put it all together in your Node.js script:
import puppeteer from "puppeteer";
import proxyChain from "proxy-chain";

(async () => {
    // launch a headless Chromium instance with the
    // ZenRows premium proxy configured
    const proxyURL = "<ZENROWS_PREMIUM_PROXY_URL>";
    const newProxyURL = await proxyChain.anonymizeProxy({ url: proxyURL });
    const browser = await puppeteer.launch({
        args: [`--proxy-server=${newProxyURL}`],
    });
    const page = await browser.newPage();

    // visit the target URL
    await page.goto("https://httpbin.io/get");

    // retrieve the page content and log it
    const body = await page.waitForSelector("body");
    const response = await body.getProperty("textContent");
    const jsonResponse = await response.jsonValue();
    console.log(jsonResponse);

    // release resources
    await browser.close();
    await proxyChain.closeAnonymizedProxy(newProxyURL, true);
})();
Launch your code to test it:
node scraper.js
You may get a net::ERR_CERT_AUTHORITY_INVALID error. Fix that by configuring Pupetteer to ignore SSL certificate errors.
A successful request will produce output like the one below. The origin field contains the proxy IP, and User-Agent is the header, both set by ZenRows. Each time you run the script, you will see a different IP and User Agent.
{
  "args": {},
  "headers": {
    "Accept": [
      "text/html,application/xhtml+xml,application/xml;q=0.9,image/avif,image/webp,*/*;q=0.8"
    ],
    // omitted for brevity...
    "User-Agent": [
      "Mozilla/5.0 (Macintosh; Intel Mac OS X 14_1) AppleWebKit/537.36 (KHTML, like Gecko) Chrome/118.0.0.0 Safari/537.36"
    ]
  },
  "origin": "38.152.15.28:6623",
  "url": "http://httpbin.io/get"
}
Awesome! You just integrated ZenRows’ premium rotating proxies into Puppetter. 👏
The next sections will provide some tips for making the most of the integration and fixing any errors.
Best Practice: Prevent Page Resources From Loading
In general, a browser makes a lot of requests to render the page, but you usually need only a few of them for web scraping. Therefore, a best practice to save machine time and resources in page rendering is to block all resources you don’t need (in this case, you’ll also save ZenRows’ API credits).
You can achieve that by configuring the browser not to load images, fonts, and/or JavaScript scripts. For example, you can prevent images from being loaded with the following snippet:
await page.setRequestInterception(true);
page.on("request", request => {
  if (request.resourceType() === "image") {
    request.abort();
  } else {
    request.continue();
  }
});
Explore our guide on how to block resources in Puppeteer to learn more.
Error Solving: Invalid SSL Certificate
When making requests through a proxy, the script may fail due to SSL certificate errors like this:
Error: net::ERR_CERT_AUTHORITY_INVALID
If you run your script in headed mode, you’ll see:
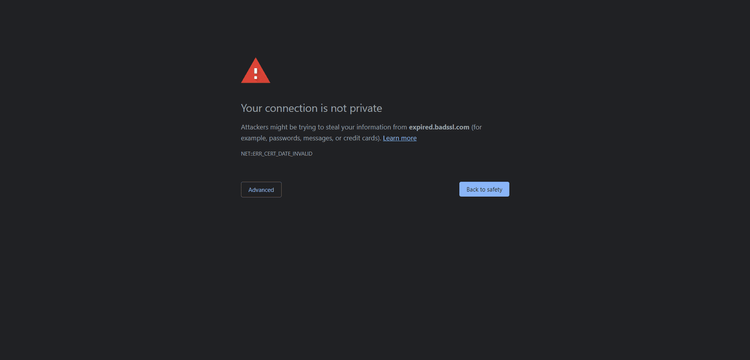
Configure Chromium to ignore HTTPS-related errors by setting the ignoreHTTPSErrors option to true:
const browser = await puppeteer.launch({
    ignoreHTTPSErrors: true,
});
Puppeteer will now be able to visit any HTTPS page with no issues.
Error Solving: Network Failed and Empty Response Errors
There are a few ways to integrate proxies into Puppeteer, but not all of them work with ZenRows. The page.authenticate() method will produce the net::ERR_EMPTY_RESPONSE error. Similarly, using the puppeteer-page-proxy package will result in net::ERR_FAILED.
As of this writing, the proxy-chain approach presented earlier is the only way to make ZenRows work with Puppeteer.
Error Solving: Limited Concurrent Requests
On a free trial, ZenRows supports up to 5 simultaneous requests with no queuing or auto-retry. When the target page involves a lot of resources, that can become a problem.
The reason is that the headless browser will make many concurrent requests, and some of them will fail with a 429 Too Many Requests error.
There are two ways to tackle this issue: A) Configure Puppeteer to avoid loading unnecessary resources. B) Upgrade to a ZenRows paid plan to gain access to a higher level of concurrency.
FAQ: What Happens When You Enable ZenRows’s JavaScript Rendering with Puppeteer? If you select the “JS Rendering” option when building the ZenRows proxy URL to integrate into Puppeteer, two things will happen:
- ZenRows and Puppeteer will both render the page: ZenRows will render the page in a headless browser and, if set, run the specified JS instructions. Puppeteer will then receive the HMTL returned by ZenRows and render it again. This process only introduces unnecessary overhead and brings no real benefit.
- You’ll lose the interaction session: The original session ends when ZenRows returns the page HTML. If you instruct Puppeteer to interact with the page, a new session will start. This may activate anti-bot systems, since the simulated interaction with the page isn’t consistent.
In short, the double rendering setup makes no sense because of performance and effectiveness reasons. Therefore, don’t activate ZenRows’ js_render parameter together with Puppeteer.
- Stopped by Bot Detection with Puppeteer: CAPTCHAs, WAFs, and Beyond Websites know how valuable their data is, and that’s why many of them protect their pages with advanced anti-bot measures. These technologies can detect and block automated requests, preventing scripts like yours from accessing their pages.
Proxies are usually not enough to get around these anti-scraping solutions. Some of these systems, such as the WAF used by G2.com, even rely on machine learning!
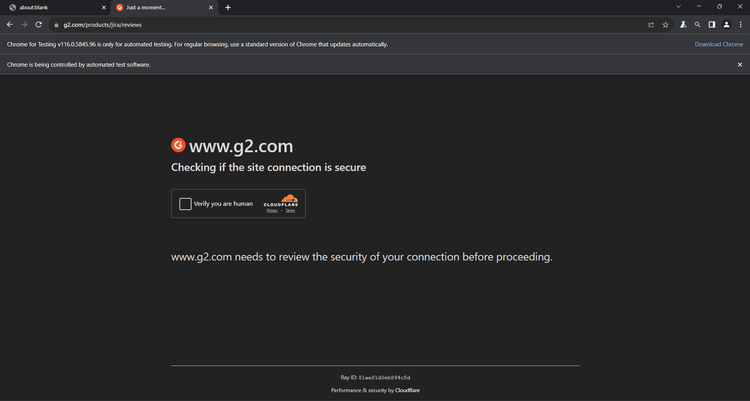
As you can imagine, implementing custom logic and workarounds in Puppeteer isn’t effective either.
The solution? Replacing Puppeteer with ZenRows!
ZenRows provides the same JavaScript rendering and user interaction simulation capabilities as Puppeteer. On top of that, it provides the most complete anti-bot bypass toolkit available. As you’re about to see in the following section, that makes it the ideal Puppeteer alternative.
Option 2: Replace Puppeteer with ZenRows to Stop Fearing Anti-Bots
ZenRows has the same functionality as Puppeteer, but guarantees greater effectiveness against anti-bot measures, and also reduces maintenance and machine costs.
It’s time to explore how to replace Puppeteer with ZenRows and verify it can scrape any web page on the web!
Step 1: Get Your ZenRows Account
Sign up for ZenRows to retrieve your API key and 1,000 free API credits, or log in.
Step 2: Set Up Your Request
You’ll get to the Request Builder. There, paste your target URL (e.g., https://www.g2.com/products/jira/reviews), enable JS rendering and check the Premium Proxies option.
Then, select your programming language (if it isn’t available in the builder, select “cURL” to get the full endpoint you can call with any HTTP client).
Lastly, choose the “API” connection mode (when available, “SDK” is also a viable option).
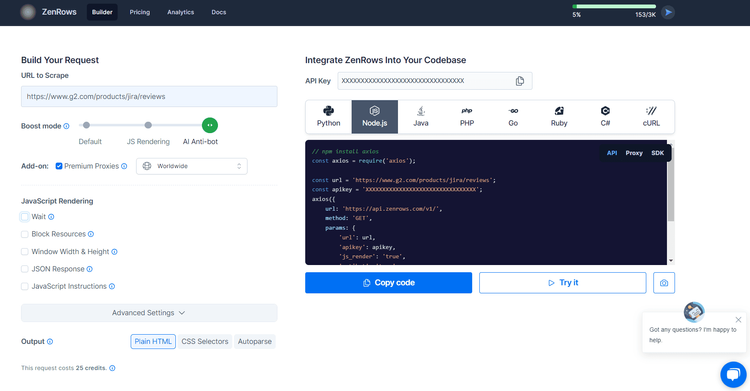
If you want to perform some interaction on the page, check “JavaScript Instructions” box. Take a look at all JS actions available.
Let’s see how to scrape data from a page with the API mode.
Step 3: Get the Unlocked HTML Via API
Still the Request Builder, click the “Try it” button to test the configured API endpoint directly. Once you’ve verified it works, you’re ready to call it in your script.
Now, retrieve your Node.js snippet by clicking the “Copy code” button (but remember that ZenRows works with any programming language). Paste it into your scraper.js script:
// npm install axios
const axios = require("axios");

const url = "https://www.g2.com/products/asana/reviews";
const apikey = "<YOUR_ZENROWS_API_KEY>";
axios({
    url: "https://api.zenrows.com/v1/",
    method: "GET",
    params: {
        "url": url,
        "apikey": "<YOUR_ZENROWS_API_KEY>",
        "js_render": "true",
        "premium_proxy": "true",
        // 'js_instructions': your JS instructions...,
    },
})
    .then(response => console.log(response.data))
    .catch(error => console.log(error));
Next, install the axios library (or use the HTTP client package you prefer):
node scraper.js
It’ll print the the HTML source code of the target page:
<!DOCTYPE html>
<head>
<meta charset="utf-8" />
<link href="https://www.g2.com/assets/favicon-fdacc4208a68e8ae57a80bf869d155829f2400fa7dd128b9c9e60f07795c4915.ico" rel="shortcut icon" type="image/x-icon" />
<title>Jira Reviews 2023: Details, Pricing, & Features | G2</title>
<!-- omitted for brevity ... -->
Congrats! You just saw how ZenRows enables you to overcome the limitations of Puppeteer. 🥳
It only remains to use an HTML parsing library to extract data from the page! The most popular one in Node.js is Cheerio.
Pricing
ZenRows operates on a pay-per-success model, not based on bandwidth use. That means you only pay for requests that produce the desired result.
Integrating ZenRows premium proxies with Puppeteer will cost you as low as 10 credits per successfully loaded page.
To optimize your scraper’s success rate, fully replace Puppeteer with ZenRows. Different pages on the same site may have different levels of protection, but using the parameters recommended above will get you covered. With this configuration, each successful request will cost 25 credits.
ZenRows offers a range of plans, with prices starting at just $49 per month. For more detailed information, please refer to our pricing page.