Axios is a powerful JavaScript library for making HTTP requests. With just a few lines of code, developers can send GET requests to a web page and retrieve its HTML content in various formats, including JSON and CSV.
However, many websites block bot traffic, which can hinder your Axios web scraper. Fortunately, combining Axios with a proxy to route your requests can help circumvent website detection.
This tutorial will show you how to do that using real-world examples. We'll explore free and paid proxies and some handy methods to avoid getting blocked.
Ready?
Prerequisites
Axios is a JavaScript library, so we'll be web scraping using NodeJS.
To get started, make sure you have NodeJS and npm installed. Then, create a new folder for your JavaScript file and initialize a new project using the following command:
mkdir scrapeaxios
cd scrapeaxios
npm init -y
It creates a package.json file with the default values.
Next, install Axios and its dependencies.
npm i axios
How to Use Proxies with Axios
Let's look at an example of setting a proxy in Axios using HTTPBin as a target page and an IP from Free Proxy List.
IP: '149.129.239.170',
port: 8080
Import Axios and add the proxy details.
const axios = require('axios');


axios.get('https://httpbin.org/ip',
    {
        proxy: {
            protocol: 'http',
            host: '149.129.239.170',
            port: 8080,
        },
    }
)
    .then(res => {
        console.log(res.data)
    }).catch(err => console.error(err))
Since the httpbin endpoint returns the public IP address of the requesting client, your code should return your proxy's IP address.
Run the code, and your result should look like this:
{ origin: '149.129.239.170' }
Great job!
Then, having the response in JSON format will come in handy. You can go about it in several ways, so here are a couple of options:
- Parse the response data using the
JSON.parsemethod. You'll get a JSON response if you succeed. Otherwise, it produces a string in most cases.
const axios = require('axios');


axios.get('https://httpbin.org/ip',
    {
        proxy: {
            protocol: 'http',
            host: '149.129.239.170',
            port: 8080,
        },
    }
)
    .then(res => {
        let data;
        try {
          data = JSON.parse(res.data);
        } catch (err) {
          // if the response is not JSON, use it as is
          data = res.data;
        }
        console.log(data);
      }).catch(err => console.error(err))
- Automatically parse the data using the
responseTypeoption.
const axios = require('axios');


axios.get('https://httpbin.org/ip',
    {
        proxy: {
            protocol: 'http',
            host: '149.129.239.170',
            port: 8080,
        },

        responseType: 'json',
    }
)
    .then(res => {
        console.log(res.data);
      }).catch(err => console.error(err))
The code for both methods yields the same result as in the example above. However, method #1, without the try-catch block, would produce a syntax error. That 's because the response returned by HTTPBin is already in JSON format.
Proxy Authentication with Axios: Username & Password
Paid proxies often require authentication with a username and password, therefore Axios offers an auth property that lets you pass them in to use your proxy server.
auth: {
	username: ''
	password: ''
}
BoldThis is how you add the property to your script:
const axios = require('axios');


axios.get('https://httpbin.org/ip',
    {
        proxy: {
            protocol: 'http',
            host: 'proxy_host',
            port: portNumber,
            auth: {
                username: '',
                password: ''

            },
        },

    }
)
    .then(res => {
        console.log(res.data);
      }).catch(err => console.error(err))
Environment Variables for an Axios Proxy
Environment variables are dynamic values that software programs can access to configure their behavior or obtain environment data. Using them, Axios allows you to specify information such as proxy settings, authentication credentials, and other configuration options.
That way, you can automatically access the proxy details without passing them in the Axios request. To do that, define the proxy settings and credentials in your environment variables. Then, send the Axios request.
Let's see an example.
In your terminal, set environment variables using the proxy server details with the following syntax and export command. For Windows, use set instead.
export HTTP_PROXY=http://<Proxy_host>:<port>
export HTTPS_PROXY=https://<Proxy_host>:<port>
Next, set the environment variable using our initial proxy details, as shown below:
export HTTP_PROXY=http://149.129.239.170:8080
Since now we don't need to include our proxy in our Axios request anymore, our code should look like this:
const axios = require('axios');


axios.get('https://httpbin.org/ip')

.then(res => {
        console.log(res.data);
      }).catch(err => console.error(err))
And this is the result:
{ origin: '149.129.239.170' }
Congratulations! You've learned a new way to configure an Axios proxy. 🎉
Use a Rotating Proxy with Axios
Websites can detect and block requests from specific IP addresses, so you need to distribute the scraping traffic across multiple proxies to avoid that. If you rotate IPs, your scraper will be notably more effective.
Different approaches to creating a proxy rotator include the following options:
- Manually switching proxies after a specified number of requests.
- Automating the process with an array of proxies.
- Using a proxy pool solution.
Let's try a free solution!
Rotate IPs with a Free Solution
Rotating proxies with a free solution involves using a pool of multiple proxies and randomizing each request. You can take your pick of free providers, like Free Proxy List, that offer a list of proxies you can download into a CSV file or hard code as a static array.
Let's create our proxy rotator.
Start by defining the proxy list array.
const axios = require('axios');

const proxyList = [
  { ip: '198.59.191.234', port: '8080' },
  { ip: '200.105.215.22', port: '33630' },
  { ip: '125.17.80.229', port: '8080' },
]; // Replace with your own list of proxies
Then, create a function that rotates through the proxy list. For each request, it shifts to the next proxy while returning the current proxy to the end of the queue.
// Function to rotate through the list of proxies
const rotateProxy = () => {
  const proxy = proxyList.shift(); // Get the next available proxy
  proxyList.push(proxy); // Add the current proxy back to the end of the list
  return {
    protocol: "http",
    host: proxy.ip,
    port: proxy.port,
  };
}
Make your Axios request using the rotateProxy() function as the proxy option.
axios.get('https://httpbin.org/ip',
        {
            proxy: rotateProxy(),

        }
    )
        .then(res => {
            console.log(res.data);
        }).catch(err => console.error(err))
When we put everything together and use a FOR LOOP to make multiple requests, our complete code will look like this:
const axios = require('axios');

const proxyList = [
  { ip: '198.59.191.234', port: '8080' },
  { ip: '200.105.215.22', port: '33630' },
  { ip: '125.17.80.229', port: '8080' },
]; // Replace with your own list of proxies

// Function to rotate through the list of proxies
const rotateProxy = () => {
  const proxy = proxyList.shift(); // Get the next available proxy
  proxyList.push(proxy); // Add the current proxy back to the end of the list
  return {
    protocol: "http",
    host: proxy.ip,
    port: proxy.port,
  };
}


for (let i = 0; i < 3; i++) {
    axios.get('https://httpbin.org/ip',
        {
            proxy: rotateProxy(),

        }
    )
        .then(res => {
            console.log(res.data);
        }).catch(err => console.error(err))
}
And here's the result:
{ origin: '198.59.191.249' }
{ origin: '200.105.215.22' }
{ origin: '125.17.80.229' }
Awesome! You've created your first proxy rotator with Axios.
However, as mentioned earlier, free proxies are unreliable and often fail. We only used them in this example to show you the basics. If we replace HTTPbin with OpenSea, we'll get an error message similar to the one below.
AxiosError: Request failed with status code 403
So, what's the solution? Keep reading.
Premium Proxy to Avoid Getting Blocked
Premium proxies historically had a high cost of implementation, especially for large-scale scraping. However, that changed with the appearance of solutions like ZenRows. You can get started at $49 a month, comes with a geo-location feature, and are charged for successful requests only.
Now, let's see how to use ZenRows to your advantage.
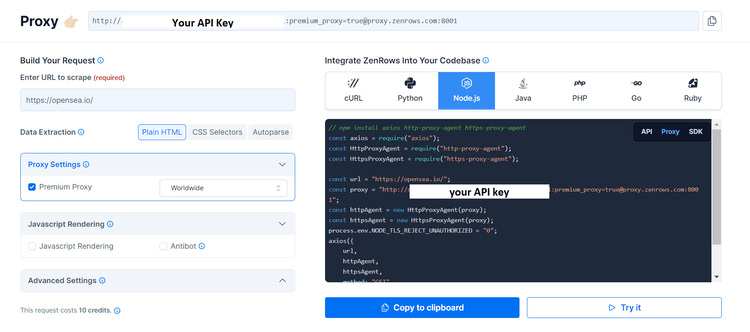
First, sign up to get your API key. You'll find it at the top of the page after you're logged in.

Next, import Axios and create your request configuration using the previous target URL (OpenSea) and your ZenRows proxy credentials.
// Import the Axios library
const axios = require('axios');

// Make a GET request to the target URL
// with the following options:
axios.get('https://opensea.io/', {
    proxy: {
        protocol: 'http',
        // The hostname of ZenRows proxy server
        host: 'proxy.zenrows.com',
        // The port number
        port: 8001,
        // authentication credentials for the proxy server
        auth: {
            // Use your API_Key as your username
            username: 'API_key',
            // Set the premium proxy parameter as your password
            password: 'premium-proxy=true'
        },
    },
})
    .then(res => {
        // Log the response data to the console
        console.log(res.data);
    })
    .catch(err => console.error(err)); // Log any errors to the console
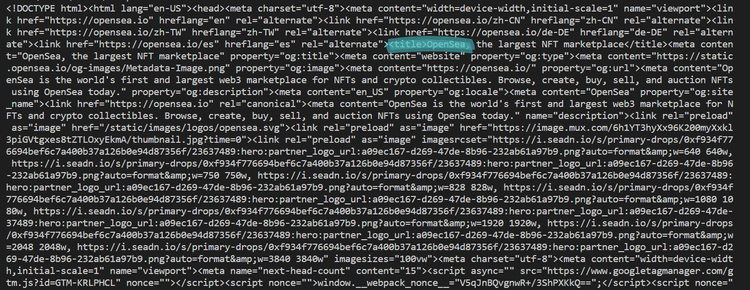
The result should look like this:

It feels great to finally gain access, right? As you can see, premium proxies like ZenRows are definitely worth it.
Conclusion
Using Axios with a proxy to route your requests will prove invaluable in bypassing blocks like Cloudflare in JavaScript.
We've explored several options and seen how free solutions often fail to get the job done. That's why you might want to consider ZenRows, as it ensures your scraper will effectively access any website. Learn more about our Proxy Rotator.
Did you find the content helpful? Spread the word and share it on Twitter, or LinkedIn.