Using a headless browser in NodeJS allows developers to control e.g. Chrome with code, providing extra functionality in order to interact with web pages and simulate human behavior.
Today, we'll look into how to use Puppeteer, the most popular in this language, for web scraping.
What Is a Headless Browser in NodeJS?
A headless browser in NodeJS is an automated browser that runs without a Graphical User Interface (GUI), spending fewer resources and being faster. It allows JavaScript rendering and performing actions (submitting forms, scrolling, etc.) like a human would.
How to Run a Headless Browser in NodeJS with Puppeteer
Now that you know what a headless browser is, let's dig into running one with Puppeteer to interact with elements on the page and scrape data.
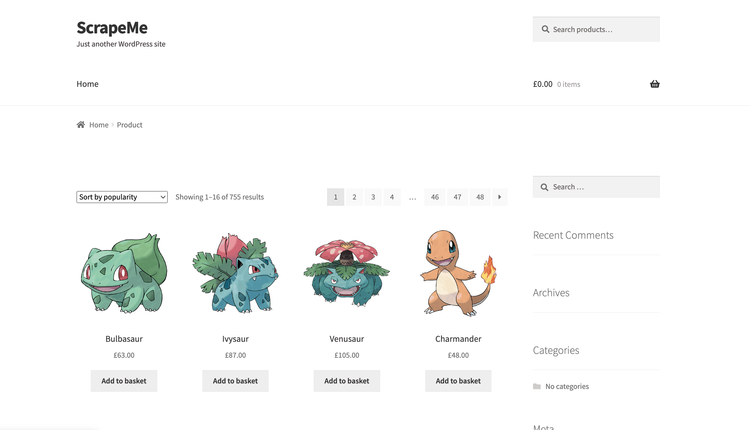
As a target site, we'll use a Pokémon store called ScrapeMe.

Prerequisites
Ensure you have NodeJS installed (npm ships with it) before moving forward.
Create a new directory and initialize a NodeJS project using npm init -y. Then, install Puppeteer with the command below:
npm i [email protected]
Note: Puppeteer will download the most recent version of Chromium after running the installation command. If you'd opt for a manual setup, which is useful if you want to connect to a remote browser or manage browsers yourself, the puppeteer-core package won't download Chromium by default.
Then, create a new scraper.js file inside the headless browser JavaScript project you initialized above.
touch scraper.js
We're ready to get started now!
Step 1: Open the Page
Let's begin by opening the site we want to scrape. For that, launch a browser instance, create a new page and navigate to our target site.
const puppeteer = require('puppeteer');

(async () => {
  // Launches a browser instance
  const browser = await puppeteer.launch();
  // Creates a new page in the default browser context
  const page = await browser.newPage();
  // Navigates to the page to be scraped
  const response = await page.goto('https://scrapeme.live/shop/');

  // logs the status of the request to the page
  console.log('Request status: ', response?.status(), '\n\n\n\n');

  // Closes the browser instance
  await browser.close();
})();
Note: The close() method is called at the end to close Chromium and all its pages.
Run the code using node scraper on the terminal. It'll log the status code of the request to ScrapeMe, as seen in the image below:

Congratulations! 200 shows your request was successful. Now, you're ready to do some scraping.
Step 2: Scrape the Data
Our goal is to scrape all Pokémon names on the homepage and display them in a list. Here's what you need to do:
Use your regular browser to go to ScrapeMe and locate any Pokémon card, then right-click on the name of the creature and select "Inspect" to open your Chrome DevTools. The browser will highlight the selected element, as shown below.

The selected element holding the Pokémon name is an h2 with the woocommerce-loop-product__title class. If you inspect other ones on that page, you'll see they all have the same class. We can use that to target all the name elements and, in turn, scrape them.
The Puppeteer Page API provides several methods to select elements on a page. One example is Page.$$eval(selector, pageFunction, args), where $$eval() runs document.querySelectorAll against its first argument, the selector. It then returns the result to its second argument, the callback page function, for further operations.
Let's leverage this. Update your scraper.js file with the below code:
const puppeteer = require('puppeteer');

(async () => {
  // Launches a browser instance
  const browser = await puppeteer.launch();
  // Creates a new page in the default browser context
  const page = await browser.newPage();

  // remove timeout limit
  page.setDefaultNavigationTimeout(0);

  // Navigates to the page to be scraped
  await page.goto('https://scrapeme.live/shop/');

  // gets an array of all Pokemon names
  const names = await page.$$eval('.woocommerce-loop-product__title', (nodes) => nodes.map((n) => n.textContent));

  console.log('Number of Pokemon: ', names.length);
  console.log('List of Pokemon: ', names.join(', '), '\n\n\n');

  // Closes the browser instance
  await browser.close();
})();
Like in the last example, we see similar operations of creating a browser instance and page. However, to disable the timeout and its errors, page.setDefaultNavigationTimeout(0); sets the navigation timeout to zero ms instead of the default 3000 ms.
Furthermore, n.textContent gets the text of all the nodes or elements with a woocommerce-loop-product__title class. Meanwhile, the $$eval() function returns an array of the Pokémon names.
Finally, the code logs the amount of Pokémon scraped and creates a comma-separated list with the names.
Run the script again, and you'll see an output like this:

Cool!
Let's see next how to interact with the webpage with Puppeteer, an extra functionality the headless browser provides us.
Interact with Elements on the Page
There are some Page APIs for interacting with elements on a page. For example, the Page.type(selector, text) method can send keydown, keyup and input events.
Take a look at the search field on the top right of the ScrapeMe site, which we can use. Inspect the element, and you'll see this:

The search field has the woocommerce-product-search-field-0 ID. We can select the element with this and trigger input events on it. To do so, add the below code between the page.goto() and browser.close() methods in your scraper.js file.
  const searchFieldSelector = '#woocommerce-product-search-field-0';

  const getSearchFieldValue = async () => await page.$eval(searchFieldSelector, el => el.value);

  console.log('Search field value before: ', await getSearchFieldValue());
  // type instantly into the search field
  await page.type(searchFieldSelector, 'Vulpix');
  console.log('Search field value after: ', await getSearchFieldValue());
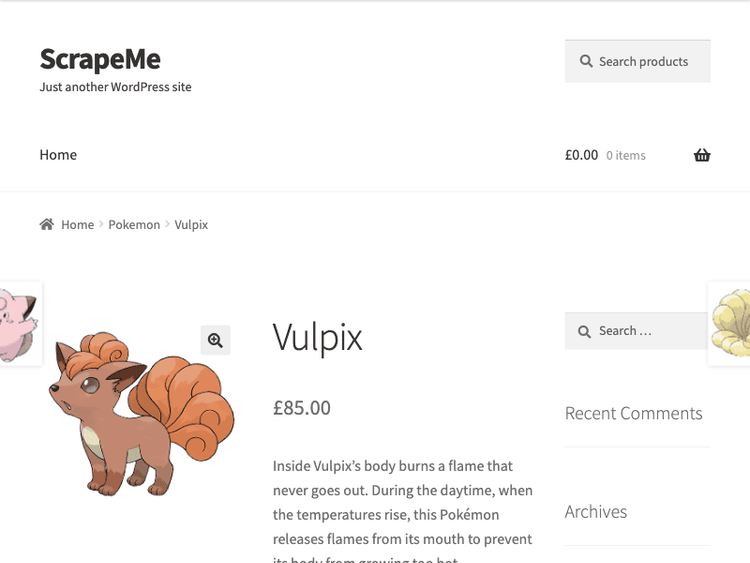
We used the page.type() method to type in the word "Vulpix" in the field.
Rerun the scraper file, and you should get this output:

The value of the search field changed, indicating the input events were successfully triggered.
Great! Let's explore other useful capabilities now.
Advanced Headless Browsing with Puppeteer in NodeJS
In this section, you'll learn how to up your Puppeteer headless browser game.
Take a Screenshot
Imagine you'd want to get screengrabs, for instance to check visually that your scraper is working properly. The good news is taking screenshots with Puppeteer is doable by calling the screenshot() method.
  // Takes a screenshot of the search results
  await page.screenshot({ path: 'search-result.png' })
  console.log('Screenshot taken');
Note: The path option specifies the screenshot's location and filename.
Run the scraper file again, and you'll see a "search-result.png" image file created in the root directory of your project upon execution:

Wait for the Content to Load
It's a best practice to wait for the whole page or part of it to load when web scraping to make sure everything has been displayed. Let's see an example of why.
Assume you want to get the description of the first Pokémon on ScrapeMe's homepage. For that, we can simulate a click event on its image, which will trigger another page load that will contain its description.
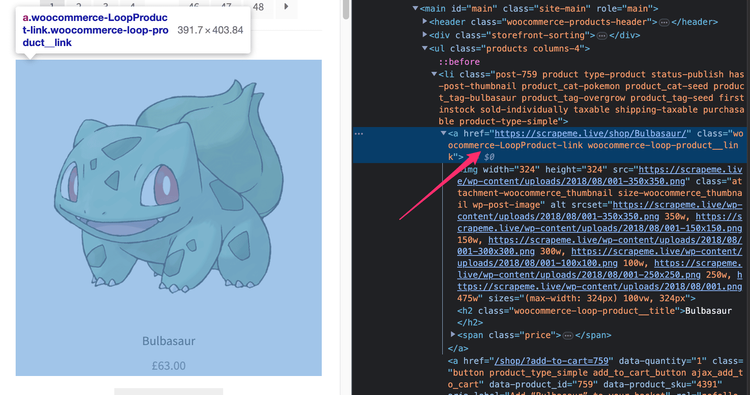
Inspecting that Pokémon's image on the homepage reveals a link with the woocommerce-LoopProduct-link and woocommerce-loop-product__link classes.

And, on the page that loads after clicking the Pokémon image, the description reveals a div element with a woocommerce-product-details__short-description class.

We'll use these classes as selectors for the elements. So you need to update the code between the page.goto() and browser.close() methods with the one below:
  // Selectors
  const pokemonDetailsSelector = '.woocommerce-product-details__short-description',
    pokemonLinkSelector = '.woocommerce-LoopProduct-link.woocommerce-loop-product__link';
  // Clicks on the first Pokemon image link (triggers a new page load)
  await page.$$eval(pokemonLinkSelector, (links) => links[0]?.click());
  // Gets the content of the description from the element
  const description = await page.$eval(pokemonDetailsSelector, (node) => node.textContent);
  // Logs the description of the Pokemon
  console.log('Description: ', description);
There, the $$eval() method selects all available Pokémon links and clicks, and the $eval() method targets the description element and gets its content.
Now it's time to run the scraper. Unfortunately, we get an error:

It occurred because Puppeteer was trying to get the description element before it was loaded.
To fix this, add the waitForSelector(selector) method to wait for the selector of the description element. This method will resolve only when the description is available. We could also wait for the page to load with waitForNavigation. Either will do the job, but we recommend waiting for a selector if possible.
  // Selectors
  const pokemonDetailsSelector = '.woocommerce-product-details__short-description',
    pokemonLinkSelector = '.woocommerce-LoopProduct-link.woocommerce-loop-product__link';
  // Clicks on the first Pokemon image link (triggers a new page load)
  await page.$$eval(pokemonLinkSelector, (links) => links[0]?.click());
  // Waits for the element with the description of the Pokemon
  await page.waitForSelector(pokemonDetailsSelector);
  // Gets the content of the description from the element
  const description = await page.$eval(pokemonDetailsSelector, (node) => node.textContent);
  // Logs the description of the Pokemon
  console.log('Description: ', description);
Run the scraper again. This time, no error appears, and the description of the Pokémon is logged.

Scrape Multiple Pages
Do you remember we scraped a list of Pokémons earlier on? We can also scrape the descriptions of each one from their respective page.
For that, use the array of Pokémon names and links to loop through, updating the code between the page.goto() and browser.close() methods:
  // Selectors
  const pokemonDetailsSelector = '.woocommerce-product-details__short-description',
    pokemonLinkSelector = '.woocommerce-LoopProduct-link.woocommerce-loop-product__link';
  // Get a  list of Pokemon names and links
  const list = await page.$$eval(pokemonLinkSelector,
    ((links) => links.map(link => {
        return {
            name: link.querySelector('h2').textContent,
            link: link.href
        };
    }))
  );
  for (const { name, link } of list) {
    await Promise.all([
      page.waitForNavigation(),
      page.goto(link),
      page.waitForSelector(pokemonDetailsSelector),
    ]);
    const description = await page.$eval(pokemonDetailsSelector, (node) => node.textContent);
    console.log(name + ': ' + description);
  }
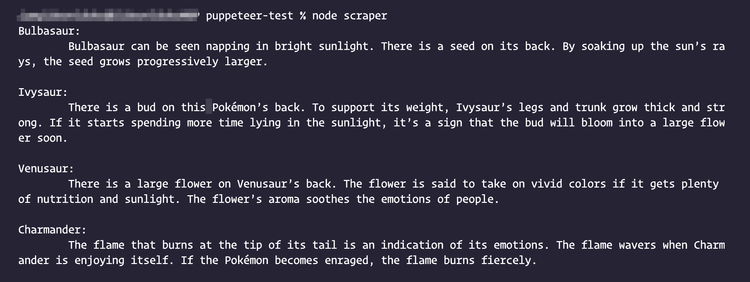
When you run the scraper file, you should start seeing the creatures and their description logged on the terminal.

Optimize Puppeteer Scripts
Like most tools, Puppeteer can be optimized to improve its general speed and performance. Here are some of the ways to do so:
Block Unnecessary Requests
Blocking requests you don't need will reduce the number of requests made. In Puppeteer, you can create an interceptor for the types of files you don't need.
Since we've been using only HTML documents when targeting ScrapeMe, blocking other types of documents, like images or stylesheets, makes sense.
  // Allows interception of requests
  await page.setRequestInterception(true);
  // Listens for requests being triggered
  page.on('request', (request) => {
    if (request.resourceType() === 'document') {
      // Allow request to be maded
      request.continue();
    } else {
      // Cancel request
      request.abort();
    }
  });
Cache Resources
Caching a resource will prevent further requests by the Puppeteer headless browser. Every new browser instance will create a temporary directory for its user data directory, which houses the user cache directory.
We can specify a permanent directory for all browser instances by specifying the userDataDir option in the Puppeteer.launch() method.
  // Launches a browser instance
  const browser = await puppeteer.launch({
    userDataDir: './user_data',
  });
Set the Headless Mode
The headless option is true by default. Changing the value to false will stop Puppeteer from running in a headless mode; instead, it'll run with a GUI.
Puppeteer allows you to set the browser mode using the headless option of the Puppeteer.launch() method.
  // Launches a browser instance
  const browser = await puppeteer.launch({
    headless: false,
  });
Note: You should perform scraping in headless mode when in production since a graphical interface is just for testing.
Avoid Being Blocked with Puppeteer
A common issue that web scrapers face is getting blocked because many websites have measures in place to block visitors that behave like bots. But here are some of the ways you can prevent that:
- Use proxies.
- Limit requests.
- Use a valid User-Agent.
- Mimic user behavior.
- Implement Puppeteer's Stealth plugin.
- Use a web scraping API like ZenRows.
For more in-depth information, check out our guide on how to avoid detection with Puppeteer.
Conclusion
In this tutorial, we looked at what a headless browser in NodeJS is. More specifically, you now know how to use Puppeteer for headless browser web scraping and can benefit from its advanced features.
However, running Puppeteer at scale or avoiding getting blocked will prove to be challenging, so you should consider a tool like ZenRows to ease your web scraping operations. It has a built-in anti-bot feature, and you can try it for free now.
Frequent Questions
What Are Some Examples of Headless Browsers in NodeJS?
Some examples of headless browsers in NodeJS include:
- Puppeteer is a library that allows you to control and automate a headless Chrome or any Chromium browser and is most popular in NodeJS
- Selenium is a suite of tools used for automating web browsers, and its WebDriver enables users to interact with web pages. It's more popular when using other languages.
- Playwright is a library similar to Selenium. However, it has some unique features, such as a wide range of browser automation support.
- NightmareJS is a high-level library built on top of Electron. It uses the Chrome DevTools protocol to control a headless version of the Chrome browser.
- PhantomJS is a headless, scriptable web browser with JavaScript. It allows developers to perform web interactions and automation via a CLI.
- CasperJS is a scripting utility based on PhantomJS that simplifies the process of automating interactions with web pages.
What Is the Best Headless Browser for NodeJS?
Puppeteer is the best headless browser for NodeJS. Its APIs are easy to use and provide full control over the headless browser. It also has a large and active community backing it.
Is Puppeteer a Headless Browser?
Yes, Puppeteer is a headless browser. It provides a high-level API to control Chrome or any Chromium browser.
How Do I Run Puppeteer in Headless Mode?
Puppeteer runs in headless mode by default but can be configured to run in full using the headless option when launching a new browser instance.
Did you find the content helpful? Spread the word and share it on Twitter, or LinkedIn.