Are you using Puppeteer and want to take a screenshot for testing or web scraping purposes? You're in the right place!
This article will teach you the three main methods of taking screenshots in Puppeteer, whether for testing or scraping purposes.
- Generate a screenshot for the visible part of the screen.
- Capture a full-page screenshot.
- Create a screenshot of a specific element.
How to Take a Screenshot With Puppeteer
There are three methods of taking a screenshot while web scraping with Puppeteer. You can screenshot the visible parts of a web page, capture the entire page, or target specific elements.
You'll learn how to achieve each in this section by taking a screenshot of a product page on ScrapeMe.
Option 1: Generate a Screenshot for The Visible Part of the Screen
Capturing the visible part of a web page is the simplest way to take screenshots in Puppeteer. The library covers the top of the page by default.
Here's the expected result of the visible part of the target page:
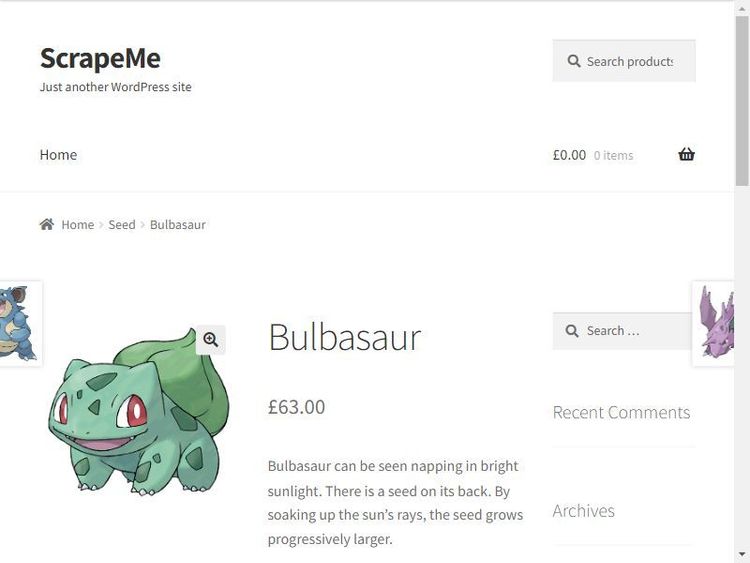
Now, let's see the code to generate this screenshot. First, start the Puppeteer instance in headless mode and visit the target product page:
// import the required library
const puppeteer = require('puppeteer');

(async () =>{

    // start browser instance in headless mode and launch a new page
    const browser = await puppeteer.launch({ headless: 'new' });
    const page = await browser.newPage();

    // visit the product page
    await page.goto('https://scrapeme.live/shop/Bulbasaur/');

    await browser.close();
})();
Expand the script with the following code. It pauses for the page to load and screenshots the visible part of the web page:
(async () =>{

    // ...

    // use setTimeout to wait for elements to load
    await new Promise(resolve => setTimeout(resolve, 5000));

    // take a screenshot of the visible part of the page
    await page.screenshot({ path: 'visible-part-screenshot.jpg' })

    await browser.close();
})();
Here's the complete code:
// import the required library
const puppeteer = require('puppeteer');

(async () =>{

    // start browser instance in headless mode and launch a new page
    const browser = await puppeteer.launch({ headless: 'new' });
    const page = await browser.newPage();

    // visit the product page
    await page.goto('https://scrapeme.live/shop/Bulbasaur/');

    // use setTimeout to wait for elements to load
    await new Promise(resolve => setTimeout(resolve, 5000));

    // take a screenshot of the visible part of the page
    await page.screenshot({ path: 'visible-part-screenshot.jpg' })

    await browser.close();
})();
Bravo! You just took a screenshot of the visible parts of a web page with Puppeteer. Now, check the screenshot in your project directory. What if you want a full page?
Option 2: Capture a Full-Page Screenshot
A full-page screenshot in Puppeteer outputs the entire page, including its scrolling effect. It only requires adding a little detail to the previous code.
To take a full-page screenshot, modify the screenshot method by adding the fullPage argument and setting its value to true:
// import the required library
const puppeteer = require('puppeteer');

(async () =>{

    // start browser instance in headless mode and launch a new page
    const browser = await puppeteer.launch({ headless: 'new' });
    const page = await browser.newPage();

    // visit the product page
    await page.goto('https://scrapeme.live/shop/Bulbasaur/');

    // use setTimeout to wait for elements to load
    await new Promise(resolve => setTimeout(resolve, 10000));

    // take a screenshot of the full page
    await page.screenshot({ path: 'full-page-screenshot.jpg', fullPage: true})

    await browser.close();
})();
The code takes a full-page screenshot of the target page. You can scroll the image, as shown:
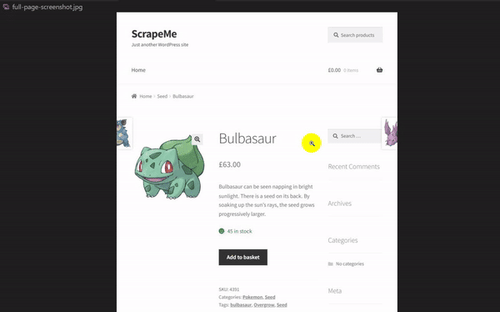
You now know how to take a full-page screenshot with Puppeteer. Nice job! Next, you'll see how to capture a specific element.
Option 3: Create a Screenshot of a Specific Element
Screenshotting a specific element captures a selected part of the web page. For instance, a screenshot of the product summary container looks like this:
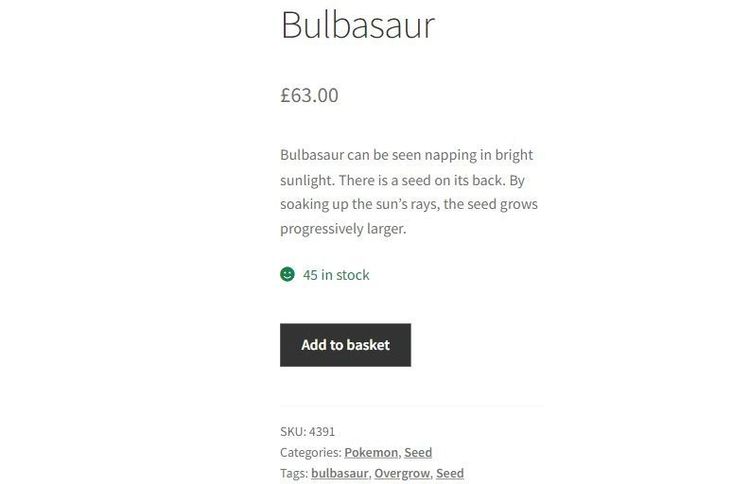
You'll have to point Puppeteer to the target element to capture it. Now, let's write the code to get the above screenshot.
To begin, launch a browser instance in headless mode and visit the target product page:
// import the required library
const puppeteer = require('puppeteer');

(async () =>{

    // start browser instance in headless mode and launch a new page
    const browser = await puppeteer.launch({ headless: 'new' });
    const page = await browser.newPage();

    // visit the target product page
    await page.goto('https://scrapeme.live/shop/Bulbasaur/');

    await browser.close();
})();
Next, wait for the page to load and grab the web page element (.summary.entry-summary) using the CSS selector. Then take its screenshot:
(async () =>{

    // ...

    // use setTimeout to wait for the page to load
    await new Promise(resolve => setTimeout(resolve, 5000));

    // obtain the specific element
    const element = await page.$('.summary.entry-summary');

    // capture a screenshot of the specific element
    await element.screenshot({ path: 'specific-element-screenshot.jpg' });

    await browser.close();
})();
The final code looks like this:
// import the required library
const puppeteer = require('puppeteer');

(async () =>{

    // start browser instance in headless mode and launch a new page
    const browser = await puppeteer.launch({ headless: 'new' });
    const page = await browser.newPage();

    // visit the target product page
    await page.goto('https://scrapeme.live/shop/Bulbasaur/');

    // use setTimeout to wait for the page to load
    await new Promise(resolve => setTimeout(resolve, 5000));

    // obtain the specific element
    const element = await page.$('.summary.entry-summary');

    // capture a screenshot of the specific element
    await element.screenshot({ path: 'specific-element-screenshot-2.jpg' });

    await browser.close();
})();
This code outputs the expected screenshot. That's great! However, you'll likely get blocked by anti-bots when taking screenshots. How can you avoid that while scraping with Puppeteer?
Avoid Getting Blocked While Taking Screenshots
Anti-bot systems will always prevent you from scraping content, blocking Puppeteer from taking the expected screenshots. You need to bypass them to scrape without getting blocked.
For example, the previous code won't output the desired content when used to screenshot a protected web page like the G2 review page.
Try it out with the following code. Replace the target URL with the G2 URL to see if it works:
// import the required library
const puppeteer = require('puppeteer');

(async () =>{

    // start browser instance in headless mode and launch a new page
    const browser = await puppeteer.launch({ headless: 'new' });
    const page = await browser.newPage();

    // visit the product page
    await page.goto('https://www.g2.com/products/asana/reviews');

    // use setTimeout to wait for elements to load
    await new Promise(resolve => setTimeout(resolve, 10000));

    // take a screenshot of the page
    await page.screenshot({ path: 'full-page-screenshot-g2.jpg'})

    await browser.close();
})();
The code returns a screenshot showing that an anti-bot has blocked Puppeteer:
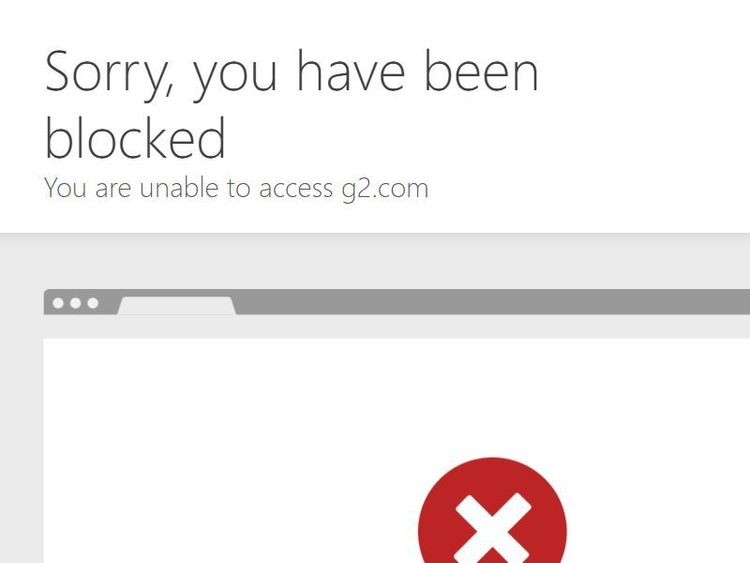
That's not the screenshot you want. A simple way to bypass that block is to use a web scraping API like ZenRows. It provides premium proxies, automatically fixes your request headers, rotates user agents, and helps you bypass any anti-bot system.
Retry the previous screenshot using ZenRows. For this, you'll replace Puppeteer with the ZenRows API and take a full-page screenshot.
Sign up, and you'll get to the Request Builder. Paste the target URL in the link box, activate the JS Rendering Boost mode, and select Premium proxies. Then, choose NodeJS as your language.
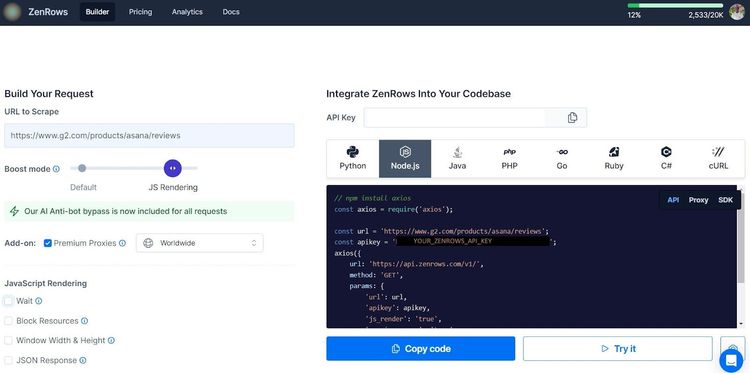
Copy and paste the generated code into your script. You'll use Axios as an HTTP client. So, ensure you install it with npm:
npm install axios
Now, let's modify the generated code to take a full-page screenshot.
First, define your Axios parameters. Ensure to add the return_screenshot parameter, and ZenRows will return a stream response. The code tells Axios to accept a steam response to make the screenshot file writeable:
// import the required modules
const axios = require('axios');
const fs = require('fs');

axios({
    url: 'https://api.zenrows.com/v1/',
    method: 'GET',
    params: {
        'url': 'https://www.g2.com/products/asana/reviews',
        'apikey': '<YOUR_ZENROWS_API_KEY>',
        'js_render': 'true',
        'premium_proxy': 'true',
        'return_screenshot': 'true'
    },

    // set response type to stream
    responseType: 'stream'
})
Write the returned stream into your project folder using a promise-based response. Expand the previous code with the following:
// ...

.then(function (response) {

	// write the image file to your project directory
    const writer = fs.createWriteStream('full-page-g2.png');
    response.data.pipe(writer);
    writer.on('finish', () => {
        console.log('Image saved successfully.');
    });
})
.catch(function (error) {
    console.error('Error occurred:', error);
});
Your final code should look like this:
// import the required modules
const axios = require('axios');
const fs = require('fs');

axios({
    url: 'https://api.zenrows.com/v1/',
    method: 'GET',
    params: {
        'url': 'https://www.g2.com/products/asana/reviews',
        'apikey': '<YOUR_ZENROWS_API_KEY>',
        'js_render': 'true',
        'premium_proxy': 'true',
        'return_screenshot': 'true'
    },

    // set response type to stream
    responseType: 'stream'
})
.then(function (response) {

    // write the image file to your project directory
    const writer = fs.createWriteStream('full-page-g2.png');
    response.data.pipe(writer);
    writer.on('finish', () => {
        console.log('Image saved successfully.');
    });
})
.catch(function (error) {
    console.error('Error occurred:', error);
});
The code captures the full page screenshot, as expected:
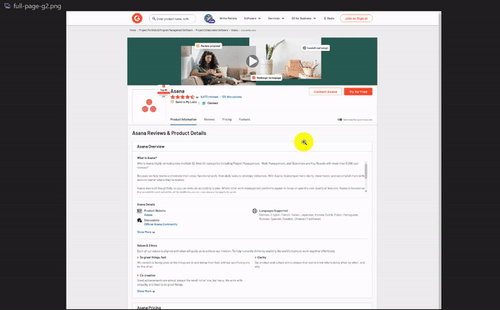
Congratulations! You've bypassed anti-bot protection and grabbed a full-page screenshot of the protected web page with ZenRows.
Conclusion
In this article, you've learned the three methods of capturing a screenshot with Puppeteer. Here's a recap of what you now know:
- Taking a screenshot of the visible part of a web page.
- Capturing a full web page, including its scrolling effects.
- Getting a screenshot of a specific target element.
- Accessing a protected website and grabbing a screenshot of its full page.
Don't forget that anti-bot mechanisms are out there to prevent you from taking screenshots while web scraping. Bypass all blocks with ZenRows and scrape any website at scale without getting blocked. Try ZenRows for free!
Did you find the content helpful? Spread the word and share it on Twitter, or LinkedIn.