Is Cloudflare blocking your scraper with a 403 Forbidden error? You're being detected as a bot, and that needs to stop!
In this article, we'll show you four ways to bypass the Cloudflare 403 Forbidden error and scrape without getting blocked.
- Use a web scraping API.
- Get premium proxies.
- Bypass fingerprinting with a headless browser.
- Fortify your headless browser.
But first, let's understand what the error really means.
What Is Error 403?
An error 403 means that the server understands your request but forbids it. That can happen when scraping with Python, NodeJS, cURL, or any other programming language.
The 403 Forbidden error usually comes up when Cloudflare detects bot-like signals, such as unusual traffic from the same IP, missing fingerprints, suspicious user interactions, such as rapidly filling out a form, etc.Â
After detecting these bot signals, Cloudflare's firewall assumes you're a threat and displays an Error 1020 screen, representing the 403 status code.
Here are four methods you can use to bypass the 403 Forbidden error without getting blocked.
1. Use a Web Scraping API
The best way to bypass anti-bots during scraping is to use a web scraping API.Â
Web scraping APIs like ZenRows allow you to scrape protected web pages without triggering the Cloudflare 403 forbidden error. As an all-in-one web scraping solution, ZenRows handles all the bypass logic behind the scenes with a single API call, so you don't have to deal with the complexities manually.
Let's try using ZenRows to scrape the Cloudflare Challenge page, a Cloudflare-protected webpage. Â
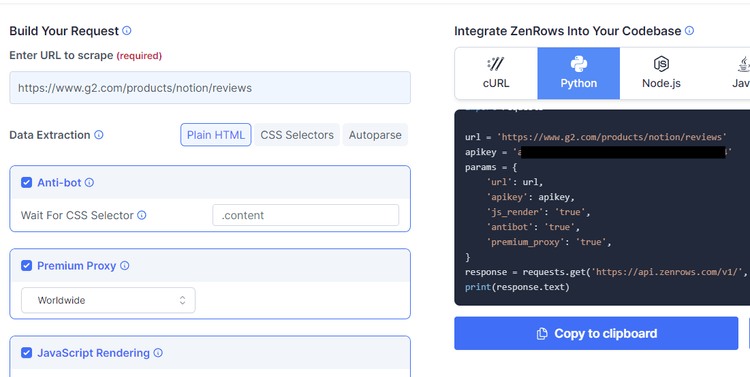
All you need to get started is sign up to open the ZenRows Request Builder. Once in the Request Builder, enter the target site's URL in the link box and activate Premium Proxies and JS Rendering. Select your programming language (Python, in this case) and choose the API connection mode.
Copy and paste the generated code into your scraper file.
Since we've used Python in this example, ensure you install the Requests library if you've not done so already:
pip3 install requests
The generated Python code should look like the following:
# pip3 install requests
import requests
url = "https://www.scrapingcourse.com/cloudflare-challenge"
apikey = "<YOUR_ZENROWS_API_KEY>"
params = {
"url": url,
"apikey": apikey,
"js_render": "true",
"premium_proxy": "true",
}
response = requests.get("https://api.zenrows.com/v1/", params=params)
print(response.text)
The above code bypasses the Cloudflare 403 Forbidden error and scrapes the target's full-page HTML:
<html lang="en">
<head>
<!-- ... -->
<title>Cloudflare Challenge - ScrapingCourse.com</title>
<!-- ... -->
</head>
<body>
<!-- ... -->
<h2>
You bypassed the Cloudflare challenge! :D
</h2>
<!-- other content omitted for brevity -->
</body>
</html>
Congrats 🎉! You've bypassed Cloudflare with Python and Zenrows!Â
2. Get Premium Proxies
Some websites only show the Cloudflare 403 forbidden error when you exceed the rate limit or use a disreputed IP address. Web scraping proxies act as middlemen between your scraper and the target server, allowing you to route your requests through different IP addresses.
You can use free or premium proxies. However, while free proxies are readily available, they often present challenges, such as slow speeds, high failure rates, and short lifespans with a high chance of getting banned.
Premium residential proxies are the most reliable for scraping. They route requests through IP addresses assigned to real users by network providers. Most premium proxy providers also offer IP rotation to distribute traffic across several residential locations.Â
These attributes make your request appear natural and increase its chances of bypassing the Cloudflare 403 forbidden error.
ZenRows is one of the top residential proxy providers. It rotates proxies from a pool of 55 million residential IPs distributed across 185+ countries. ZenRows's residential proxy also features flexible geotargeting, allowing you to access geo-restricted content.
Let's see how ZenRows' residential proxies work by requesting <https://httpbin.io/ip>
with Python's Requests.
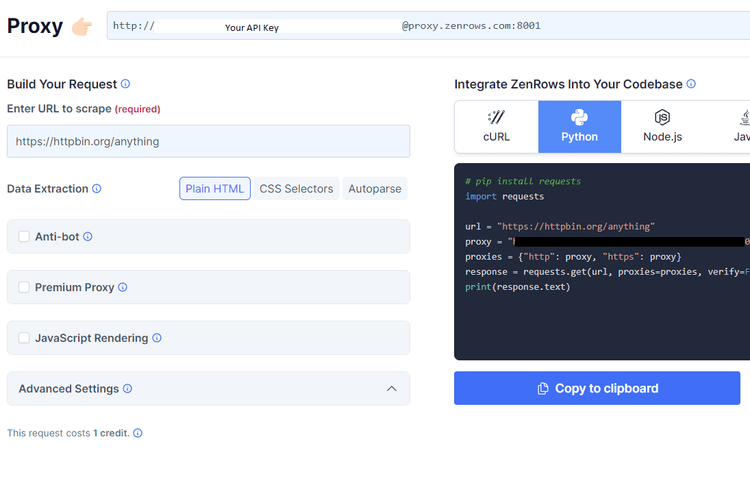
Sign up to open the Request Builder. Then, head over to Residental Proxies. Copy the proxy URL containing your proxy credentials (password and username).
Implement the copied proxy credentials as shown below:
# pip3 install requests
import requests
# define the proxy with your authentication credentials
proxies = {
"http": "http://<ZENROWS_PROXY_USERNAME>:<ZENROWS_PROXY_PASSWORD>@superproxy.zenrows.com:1337",
"https": "https://<ZENROWS_PROXY_USERNAME>:<ZENROWS_PROXY_PASSWORD>@superproxy.zenrows.com:1338",
}
# set the target URL
url = "https://httpbin.io/ip"
# request the target website
response = requests.get(url, proxies=proxies)
# print the response to see if the proxy worked
print(response.text)
The above rotates your IP per request. Here's a sample output for three consecutive requests:
# request 1
{
"origin": "78.10.89.181:58974"
}
# request 2
{
"origin": "24.115.78.114:38732"
}
# request 3
{
"origin": "81.190.33.78:33908"
}
Check out how to use a proxy with Python's Requests to learn more.
However, proxies are more suitable when the Cloudflare error 403 appears after multiple requests, an IP ban, or due to geo-restrictions. They're insufficient for bypassing advanced anti-bot protections that flag bot-like attributes beyond IP reputation.Â
3. Bypass Fingerprinting With a Headless Browser
Cloudflare uses security techniques, including TLS fingerprinting, to identify and block web clients. During a TLS handshake, Cloudflare analyzes multiple parameters to determine if the incoming request is legitimate or potentially malicious.
Non-browser sources like HTTP client libraries are usually labeled malicious, resulting in the Cloudflare 403 Forbidden Error. You can avoid this issue by simulating human-like behavior with a headless browser.
Puppeteer, Selenium, and Playwright are popular headless browsers that simulate an entire browser environment, including JavaScript rendering, DOM manipulation, cookie handling, etc. While anti-bots often detect their fingerprints as bot-like, you can configure them to run actual browser executables (e.g., Chrome, Firefox, etc.).Â
However, to increase the chance of bypassing TLS fingerprinting checks, it's better to configure them to mimic specific network parameters like cipher suites, TLS versions, and extensions. You would typically need advanced setups to achieve this, such as setting TLS tunnels via proxies or custom TLS tweaking.
That said, there's still a high chance these techniques won't work. Fortunately, you can fortify your headless browser to avoid these limitations.Â
4. Fortify Your Headless Browser
A fortified headless browser is a modified version of the base headless browser designed to avoid anti-bot detection. It includes patches that address the limitations of the base version, making it less likely to trigger blocks like the Cloudflare 403 error.
Popular open-source solutions include Puppeteer Extra Stealth for Puppeteer and the Playwright stealth for Playwright, which hide bot parameters like the User Agent HeadlessChrome
flag and the WebDriver property.
However, these open-source stealth plugins still can't keep up with Cloudflare's frequent security updates and may miss some fingerprint details.
The good news is you can apply advanced fortification using the ZenRows Scraping Browser, which integrates seamlessly with Playwright and Puppeteer with a single line of code.
The ZenRows Scraping Browser efficiently patches your headless browser scraper with essential fingerprints and plugins to significantly boost its success rate. It also has pre-installed rotating residential proxies, eliminating the complexities of manual setup.Â
The Scraping Browser is highly scalable. It runs in the cloud without impacting your machine's memory. Let's see how it works by integrating it with the previous Playwright code.
To begin, sign up to open the Request Builder. Then, go to the Scraping Browser Builder and copy the browser URL.
Integrate the copied browser connection URL as shown in the following code that takes the page screenshot:
# pip3 install playwright
# playwright install
import asyncio
from playwright.async_api import async_playwright
import time
async def main():
# launch the Playwright instance
async with async_playwright() as p:
# set the connection URL
connectionURL = "wss://browser.zenrows.com?apikey=<YOUR_ZENROWS_API_KEY>"
# launch the browser with the connection URL
browser = await p.chromium.connect_over_cdp(connectionURL)
# create a new page
page = await browser.new_page()
# navigate to the desired URL
await page.goto("https://www.scrapingcourse.com/cloudflare-challenge")
# wait for the challenge to resolve
time.sleep(10)
# await page.wait_for_load_state("networkidle")
await page.screenshot(path="screenshot.png")
# close the browser
await browser.close()
# run the main function
asyncio.run(main())
The scraper bypasses Cloudflare and accesses the page successfully:
Congratulations! You've bypassed Cloudflare with Playwright and ZenRows.
Conclusion
In this article, you've learned four ways to bypass the Cloudflare 403 error. While solutions like headless browsers and open-source stealth plugins can increase evasion chances, they don't guarantee continuous success. They're also unscalable and have high memory overhead.
The easiest way to bypass the Cloudflare 403 error is to use ZenRows, an all-in-one web scraping solution. Whether scraping with an HTTP client or a headless browser, ZenRows provides the correct integration that fits your needs.Â
Try ZenRows for free now - no credit card required!