Scraping sites is becoming increasingly difficult due to anti-bot systems. Fortunately, CloudProxy can help you with that, and we'll show you how below.
Get ready!
What Is CloudProxy
CloudProxy is a web scraping tool that allows developers to route requests through cloud-based proxy servers, which simplifies the process of setting up a proxy pool in order to avoid IP blocking and rate limiting.
The supported popular cloud providers include DigitalOcean, AWS, Google Cloud, and Hetzner.
How CloudProxy Works
CloudProxy uses cloud vendors to provide proxy servers. Using its API tokens, CloudProxy can interact with the cloud provider's services to create virtual instances that act as proxies.
Once these instances are created, the tool automatically equips them with everything they need to become functional proxies. That includes server software, network configurations, and connectivity.
CloudProxy then manages a pool of functional proxies, allowing for rotation and request distribution across multiple IP addresses. That's pivotal for a higher chance of avoiding detection. You can access those proxies via an API to integrate them dynamically with your scraper.
Overall, the tool uses cloud infrastructure to simplify the process of routing requests through multiple web scraping proxies.
How to Use CloudProxy
Here are the steps you need to take:
Step 1: Install Docker
CloudProxy's use requires Docker. So to follow along in this tutorial, install Docker:
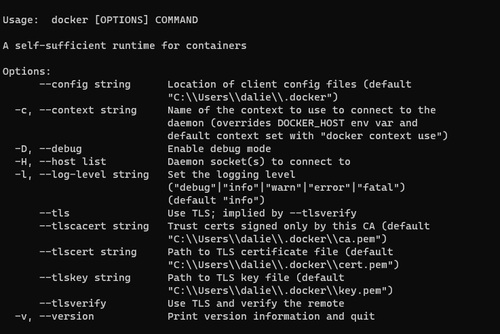
Now, check if it's installed and running correctly with the following command:
docker
You should get something like this:

On Linux systems like Ubuntu, you can run the below command to get the status of the Docker service:
systemctl status docker
Step 2: Set Up a Proxy Pool
Sign up for a supported cloud provider to get your API key. Follow the steps in the link below to do this for your provider of choice:
Then, set up the required environment variables. They're also present in the above links.
Next, download the latest CloudProxy Docker image:
docker pull laffin/cloudproxy:latest
This command assumes that Docker is running on your machine.
Lastly, start the CloudProxy container while setting up proxy authentication:
docker run -e USERNAME='CHANGE_THIS_USERNAME' -e PASSWORD='CHANGE_THIS_PASSWORD' -it -p 8000:8000 laffin/cloudproxy:latest
You can also set up environment variables at this stage. Here's an example:
docker run -e USERNAME='CHANGE_THIS_USERNAME' -e PASSWORD='CHANGE_THIS_PASSWORD' -e DIGITALOCEAN_ENABLED=True -e DIGITALOCEAN_ACCESS_TOKEN=YOUR_DIGITALOCEAN_ACCESS_TOKEN -it -p 8000:8000 laffin/cloudproxy:latest
Make sure to replace placeholder values with your DigitalOcean credentials.
Your CloudProxy container will start running, and your terminal will look like this:

Step 3: Leverage Proxy Pool
Since you have the CloudProxy container running, it's also managing a proxy pool. You can access it by making API calls to http://localhost:8000.
The port may differ depending on your Docker configuration, but it's 8000 by default.
Now, you need to integrate this proxy pool and randomly select proxies for each request.
We'll use Python Requests to build the scraper, so install the library with the following command:
pip install requests
Then, import the necessary libraries: Requests and Random. The Random library is important for selecting a proxy at random from the list.
import random
import requests as requests
After that, create a function that'll send a GET request to http://localhost:8000 to retrieve a proxy list and then select a random proxy.
# Returns a random proxy from CloudProxy
def random_proxy():
    ips = requests.get("http://localhost:8000").json()
    return random.choice(ips['ips'])
Lastly, use a FOR LOOP to make multiple requests to your target website using the selected proxies. We'll use Ipify as a target URL to see the IP address from which our request originates.
num_requests = 2  # Number of requests to make

# Make multiple requests using the proxy pool
for _ in range(num_requests):
    proxies = {"http": random_proxy(), "https": random_proxy()}
    response = requests.get("https://api.ipify.org", proxies=proxies)
    print(response.text)
Here's the complete code when we put everything together and print our response to verify it works:
import random
import requests


# Returns a random proxy from CloudProxy
def random_proxy():
    ips = requests.get("http://localhost:8000").json()
    return random.choice(ips['ips'])


num_requests = 2  # Number of requests to make

# Make multiple requests using the proxy pool
for _ in range(num_requests):
    proxies = {"http": random_proxy(), "https": random_proxy()}
    response = requests.get("https://api.ipify.org", proxies=proxies)
    print(response.text)
And this is our result:
52.56.208.249
And if we try again, we see a different IP was used:
13.42.37.166
If your result isn't your device's IP, you've done everything correctly and successfully hidden your scraper behind a cloud proxy.
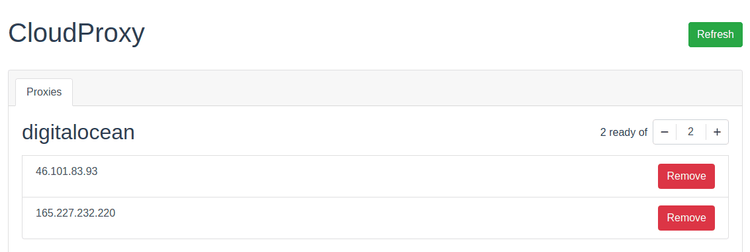
Keep in mind that you can see your proxy list at https://localhost:8000/ui like in the image below:

To test CloudProxy with a real-world website, let's replace Ipify as a target URL with a Cloudflare-protected website: G2.
Here's our result:
<!DOCTYPE html>
<html lang="en-US">
   <head>
      <title>Access denied</title>
//..
Sadly, we were denied access because CloudProxy doesn't work against advanced anti-bot protection. Instead, it uses datacenter IPs that are easily detected and blocked by Cloudflare.
Best CloudProxy Alternative
A strong CloudProxy alternative would require rotating residential proxies, which are less likely to be blocked. However, residential proxies alone aren't enough in many cases. That's why the ultimate solution is a complete anti-bot bypass toolkit that, besides providing you with residential IPs, emulates human behavior to fly under the radar. ZenRows is a web scraping solution that fits these requirements.
Let's see it in action against the below page that CloudProxy couldn't scrape. To follow along, sign up to get your free API key.
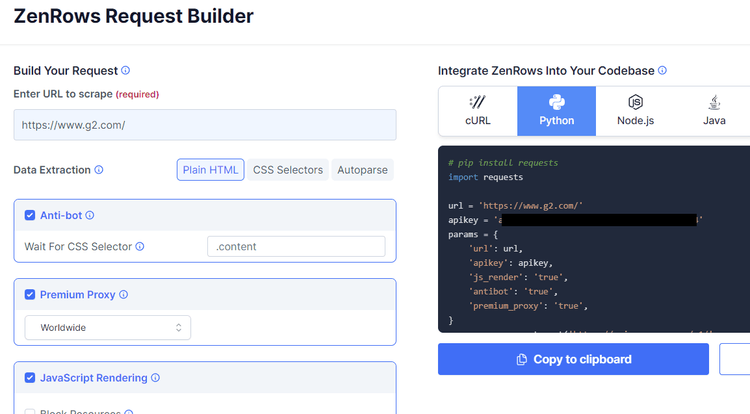
You'll get to the Request Builder, where you have to pass in the target URL (https://www.g2.com/) and check the recommended boxes for "Anti-bot", "Premium Proxy", and "JavaScript Rendering".

Great! Your scraping script is ready now. You can proceed to test this CloudProxy alternative.
Now, install Python Requests using the following command (any other HTTP library would also work):
pip install requests
Then, copy the code ZenRows provided and run it in your favorite editor.
# pip install requests
import requests

url = 'https://www.g2.com/'
apikey = 'Your API Key'
params = {
    'url': url,
    'apikey': apikey,
	'js_render': 'true',
	'antibot': 'true',
	'premium_proxy': 'true',
}
response = requests.get('https://api.zenrows.com/v1/', params=params)
print(response.text)
This is what you'll get:
//..
<title>Business Software and Services Reviews | G2</title>
//..
Congrats, you've finally bypassed a page protected by advanced anti-bot measures!
Conclusion
CloudProxy can be a solution for scraping sites that don't block datacenter IPs nor have advanced anti-bot detection like Cloudflare. However, most relevant websites today use advanced protection systems, so you might want to consider ZenRows, the ultimate bypass toolkit for all anti-bot systems. Sign up now to get your 1,000 free API credits.
Did you find the content helpful? Spread the word and share it on Twitter, or LinkedIn.