Is your web scraper getting blocked even when using a headless browser? In this tutorial, you'll learn how to mask Playwright better to bypass Cloudflare.
Let's begin!
What Is Cloudflare
Cloudflare is a security and performance optimization company whose service Bot Management is the nightmare of many scrapers. It's a web application firewall (WAF), used by around 1/5 of internet sites, that detects and blocks scrapers systematically. This includes headless browsers like Playwright and Selenium.
How Cloudflare Works
Cloudflare uses various methods to compare and distinguish traffic originated by human users and by bots, including:
- Behavioral Analysis: It tracks multiple characteristics of the user's interactions with the website, such as mouse movements, clicks, and page load times.
- IP Reputation Analysis: It checks the IP of each request against a database to see if it has been involved in scraping activities.
- User-Agent Analysis: That is a string that identifies the browser or device requesting a website. Scrapers often use generic or easily recognizable User-Agent strings, which Cloudflare can detect.
- CAPTCHA Tests: When a request is made to a website, the system may decide to test if the user is a human or a robot. If the user passes, the request will be allowed to proceed. Otherwise, it'll be blocked.
- Request Rate Analysis: This method involves monitoring the number of requests made to a website and identifying patterns typical for automated bots. For example, bots often make a large number of requests in a short period.
Take a look at our Cloudflare bypass guide to learn more about these defensive techniques.
Why Base Playwright Is NOT Enough to Bypass Cloudflare
Base Playwright may not be enough to bypass Cloudflare's anti-bot measures. The reason? Although this or other browser automation libraries can simulate human-like browsing behavior and solve some of the challenges, more advanced techniques may require additional work to bypass, such as using proxies and custom user agents.
As proof, let's set up a Playwright project with NodeJS and observe how it falls short in getting around Cloudflare.
Step #1: Make sure to have Node.js and npm installed on your system.
Step #2: Navigate to the desired directory and create a new project by running this command:
npm init
Step #3: Now, install Playwright as a dependency with the command below.
npm install playwright
Step #4: Great Job! Now you're ready to use Playwright. Create a new file in your project directory with a .js extension, such as scraper.js, and write a script to access https://g2.com and take a screenshot of it.
const playwright = require("playwright");

async function scraper() {
  const browser = await playwright.chromium.launch({ headless: true });
  const context = await browser.newContext();
  const page = await context.newPage();
  await page.goto("https://g2.com");
  await page.waitForTimeout(1000);
  await page.screenshot({ path: "screenshot.png", fullPage: true });
  await browser.close();
}

scraper();
Note: As you can see on line four, our scraper uses Chromium as a browser, but you can choose another one.
Step #5: Execute the complete code with this command:
node scraper.js
Here's the result:
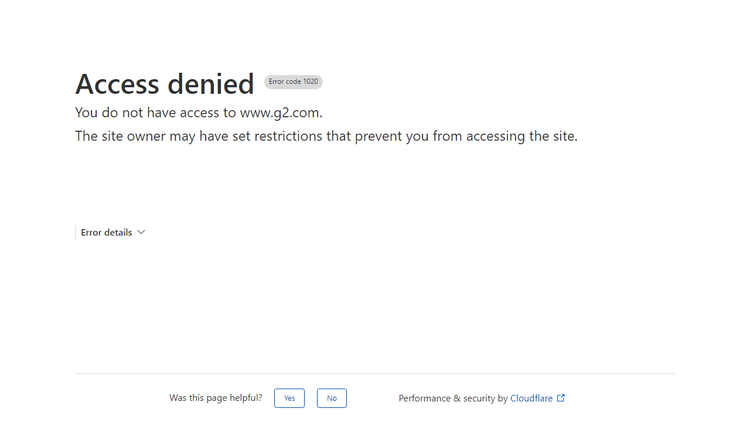
Sadly, the basic version of Playwright is recognized as a bot and consequently denied access to the website.
We'll explore several techniques that will help you win over Cloudflare in the following section. Keep reading!
How to Mask Playwright to Bypass Cloudflare
Let's see several ways to deal with the detection methods Cloudflare uses. Typically, you'll need a combination of them to make your script work.
Method 1: Simulate Human Behavior
You can modify our previous Playwright scraper code by adding random delays, scrolling, and other interactions with the page to make the automated browser appear more human-like.
const playwright = require("playwright");

async function getData() {
  const browser = await playwright.chromium.launch();
  const context = await browser.newContext();
  const page = await context.newPage();
  await page.goto("https://books.toscrape.com/");

  // Add a random delay of 1 to 5 seconds to simulate human behavior
  await new Promise(resolve => setTimeout(resolve, Math.floor(Math.random() * 4000 + 1000)));

  // Scroll the page to load additional content
  await page.evaluate(() => window.scrollBy(0, window.innerHeight));

  // Add another random delay of 1 to 5 seconds
  await new Promise(resolve => setTimeout(resolve, Math.floor(Math.random() * 4000 + 1000)));

  const data = await page.evaluate(() => {
    const results = [];
    // Select elements on the page and extract data
    const elements = document.querySelectorAll(".product_pod");
    for (const element of elements) {
      results.push({
        url: element.querySelector("a").href,
        Name: element.querySelector("h3").innerText,
      });
    }
    return results;
  });
  console.log(data);
  await browser.close();
}

getData();
Method 2: Use Proxies
When scraping a website, it's easy to get banned if you make too many requests in a short period of time. You can avoid that by using rotating proxies so that you'll seem to be different users.
Here's how to set up proxies with Playwright.
const playwright = require("playwright");

async function getData() {
  // Launch a new instance of the browser
  const browser = await playwright.chromium.launch();

  // Create a new context with the specified proxy
  const context = await browser.newContext({
    proxy: {
      server: 'PROXY_ADDRESS:PROXY_PORT',
      username: 'PROXY_USERNAME',
      password: 'PROXY_PASSWORD'
    }
  });

  // Create a new page within the context
  const page = await context.newPage();

  // Navigate to the target website
  await page.goto("https://books.toscrape.com/");

  // Evaluate the page's content to extract the data we want
  const data = await page.evaluate(() => {
    const results = [];
    // Select the product pods on the page and extract data
    const elements = document.querySelectorAll(".product_pod");
    for (const element of elements) {
      results.push({
        url: element.querySelector("a").href, // Extract the URL of each product
        Name: element.querySelector("h3").innerText, // Extract the name of each product
      });
    }
    return results;
  });

  // Log the extracted data to the console
  console.log(data);

  // Close the browser
  await browser.close();
}

// Call the getData function to start the process
getData();
Replace PROXY_ADDRESS and PROXY_PORT with the address and port of your proxy server.
If necessary, you can also replace PROXY_USERNAME and PROXY_PASSWORD with a username and password.
Method 3: Set a Custom User-Agent
User-Agents contain information about the browser, operating system, and other details regarding the client that makes the requests. To avoid being flagged, it's better to use a custom User-Agent that resembles a common web browser instead of the default value provided by Playwright.
Take a look at how we did it!
const playwright = require("playwright");

async function getData() {
  const browser = await playwright.chromium.launch();
  const context = await browser.newContext();
  const page = await context.newPage();

  // Set custom headers
  await page.setExtraHTTPHeaders({
    'User-Agent': 'Mozilla/5.0 (Windows NT 10.0; Win64; x64) AppleWebKit/537.36 (KHTML, like Gecko) Chrome/110.0.0.0 Safari/537.36',
    'Accept-Language': 'en-US,en;q=0.9'
  });

  await page.goto("https://books.toscrape.com/");
  const data = await page.evaluate(() => {
    const results = [];
    // Select elements on the page and extract data
    const elements = document.querySelectorAll(".product_pod");
    for (const element of elements) {
      results.push({
        url: element.querySelector("a").href,
        Name: element.querySelector("h3").innerText,
      });
    }
    return results;
  });
  console.log(data);
  await browser.close();
}

getData();
We set the User-Agent and a few extra HTTP headers to make it look like the requests are coming from a human user using a web browser.
Method 4: Solve CAPTCHAs
You can apply different tools to solve CAPTCHAs using Playwright. For example, the most commonly used plugin is the [@extra/recaptcha](https://www.npmjs.com/package/@extra/recaptcha) Playwright library combined with 2Capthca.
This NodeJS library provides a page.solveRecaptchas() method to solve reCAPTCHAs and hCaptchas automatically. And when it's not enough, 2Captha's human workers will solve the CAPTCHA manually.
Now, let's get to work!
Step #1: Start by navigating to a working directory and installing @extra/recaptcha.
npm i @extra/recaptcha
Step #2: Get an access token (API key) from 2Captcha.
Step #3: Create a new file in your directory called bypassCaptcha.js. Here, you'll write a script to bypass CAPTCHAs, including our token and https://www.google.com/recaptcha/api2/demo as a target.
// Import playwright-extra library
const { chromium } = require("playwright-extra");

// Import the Recaptcha plugin from playwright-extra library
const RecaptchaPlugin = require("@extra/recaptcha");

// Define an asynchronous function to bypass the reCAPTCHA
async function bypassRecaptcha() {
  // Define the options for the reCAPTCHA plugin
  const RecaptchaOptions = {
    // Enable visual feedback for the reCAPTCHA
    visualFeedback: true,
    // Provide the ID and token for the reCAPTCHA provider
    provider: {
      id: "2captcha",
      token: "XXXXXXX",
    },
  };

  // Use the RecaptchaPlugin with the options defined above
  chromium.use(RecaptchaPlugin(RecaptchaOptions));

  // Launch a headless instance of Chromium browser
  chromium.launch({ headless: true }).then(async (browser) => {
    // Create a new page in the browser
    const page = await browser.newPage();

    // Navigate to the reCAPTCHA demo page
    await page.goto("https://www.google.com/recaptcha/api2/demo");

    // Solve the reCAPTCHA on the page
    await page.solveRecaptchas();

    // Wait for navigation and click the demo submit button
    await Promise.all([
      page.waitForNavigation(),
      page.click(`#recaptcha-demo-submit`),
    ]);

    // Take a screenshot of the page
    await page.screenshot({ path: "response.png", fullPage: true });

    // Close the browser instance
    await browser.close();
  });
}

// Call the `bypassRecaptcha` function
bypassRecaptcha();
Here's our result:
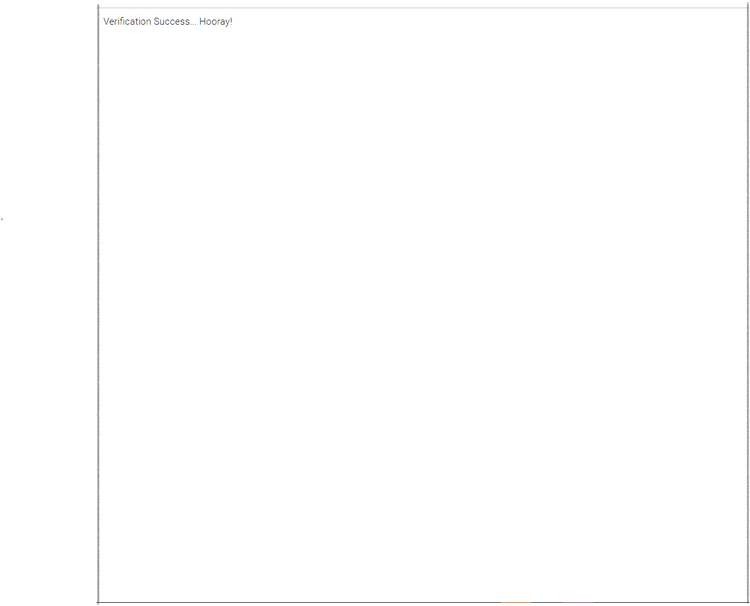
Yay, you succeeded in accessing a CAPTCHA-protected page!
Note: There are two main approaches when it comes to CAPTCHAs: 1) solving them, as we did, and 2) avoiding them, retrying when a request fails. The second way is usually preferred by professional scrapers since it's more reliable and you save tons of money. An example of a tool that does the latter for you is ZenRows.
Method 5: Add Playwright-extra
Playwright-extra is a lightweight plugin framework for Playwright that enables other useful add-ons. The one we'll use for bypassing Cloudflare is called Puppeteer-extra-plugin-stealth, which uses several techniques to hide the use of a headless browser: changing the User-Agent, generating mouse events, among other anti-bot measures.
Let's see the plugin in action. But before that:
Do you remember we tried to scrape https://nowsecure.nl but failed with base Playwright? Let's try again but with https://www.g2.com/ this time to add some diversity.
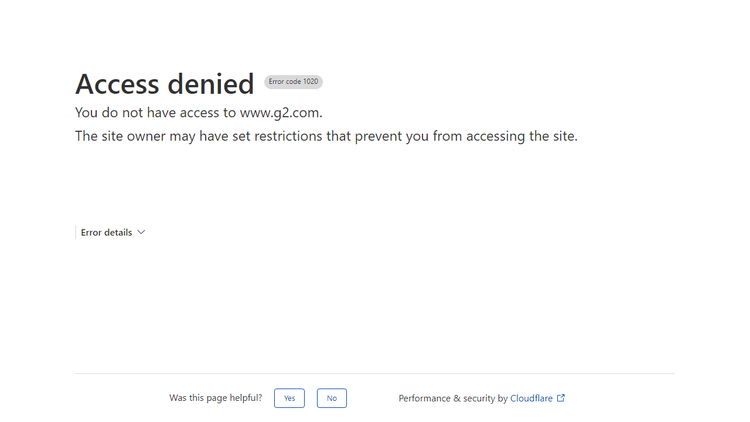
Same, we got to the famous Access denied screen.
Next, we'll use Puppeteer-extra-plugin-stealth to avoid being blocked:
Step #1: Install Playwright-extra and Puppeteer-extra-stealth in your working directory.
npm i playwright-extra puppeteer-extra-plugin-stealth
Step #2: Write the script to access and take a snapshot of the homepage.
// playwright-extra is a drop-in replacement for playwright,
// it augments the installed playwright with plugin functionality
const { chromium } = require("playwright-extra");

// Load the stealth plugin and use defaults (all tricks to hide playwright usage)
// Note: playwright-extra is compatible with most puppeteer-extra plugins
const stealth = require("puppeteer-extra-plugin-stealth")();

// Add the plugin to Playwright (any number of plugins can be added)
chromium.use(stealth);

// That's it. The rest is Playwright usage as normal 😊
chromium.launch({ headless: true }).then(async (browser) => {
  const page = await browser.newPage();

  console.log("Testing the stealth plugin..");
  await page.goto("https://g2.com", { waitUntil: "networkidle" });
  await page.screenshot({ path: "g2 passed.png", fullPage: true });

  console.log("All done, check the screenshot. ✨");
  await browser.close();
});
Run it, and enjoy:
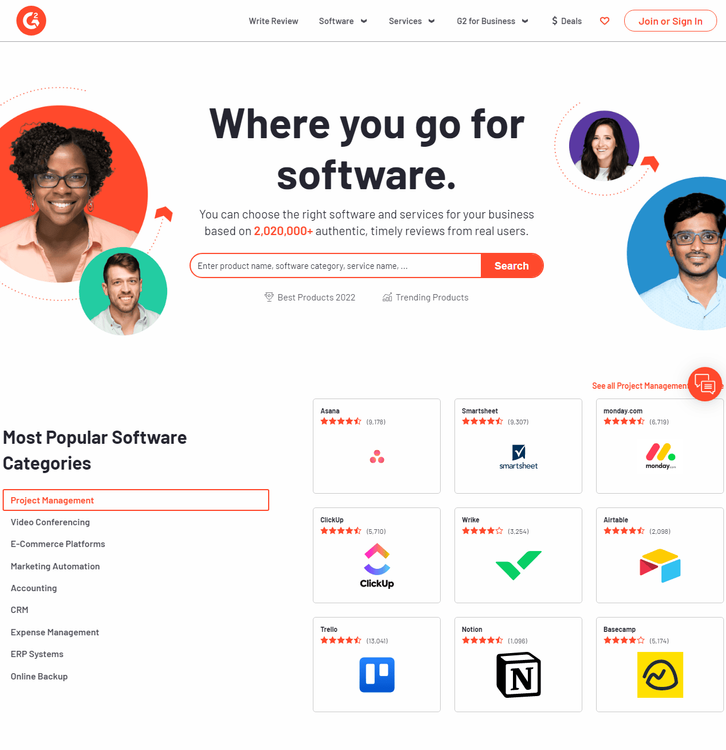
Looks nice, right? Unfortunately, not all pages have the same security level, even when sharing the same domain. For instance, product and review pages are usually harder to access than the homepage.
How do we know that? You can see that by yourself by testing the script above but pointing it to a product review page.
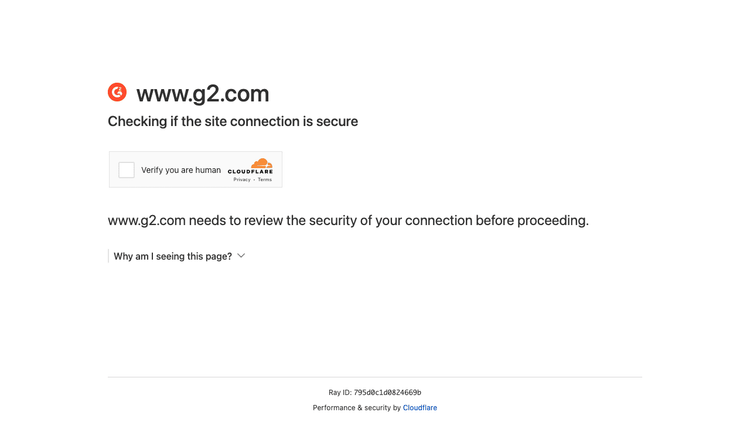
We were blocked again.
Let's not panic; we're about to see a solution that will end our nightmare.
Playwright Limitations: Go Around Them with ZenRows
Playwright has strong sides as a browser automation tool but also multiple limitations when it comes to bypassing Cloudflare's anti-bot measures.
As we've seen, complementary measures (proxies, user agents, etc.) partially help, but you might still get blocked while web scraping when Cloudflare employs more advanced bot detection techniques. Additionally, as anti-bot measures like Akamai are constantly evolving, what works today might not work tomorrow.
Therefore, to ensure a more reliable scraping process and get the data you want, it's recommended to use a web scraping tool like ZenRows, which offers many features to avoid detection. ZenRows streamlines the data scraping process and provides you with the content of any webpage with a single API call.
We'll show you the difference using G2's product review page as an example.
Step #1: Create a free account in seconds.
Step #2: On the Request Builder page, enter https://www.g2.com/products/asana/reviews as the target URL and choose Node.js as a language. Then, activate Premium Proxy, JavaScript Rendering and Antibot to overcome the anti-bot protections. As an extra, we added CSS selectors to grab the title of the page and the number of reviews.
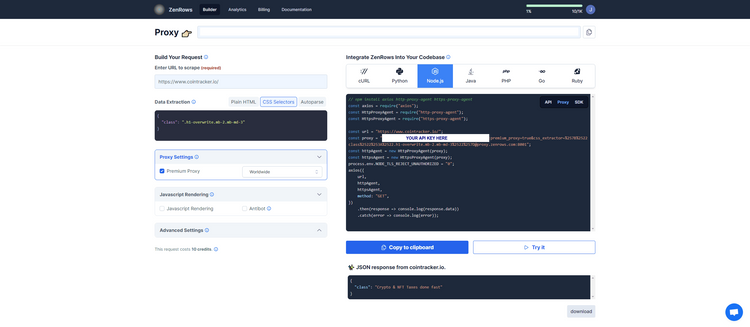
We'll just click on the Try it button first to see if it works, but you can copy the automatically generated Node.js script and use it in your codebase.
The output will be the following.
{
   "stats": [
       "9,183 reviews",
       "129 discussions"
   ],
   "title": "Asana Reviews & Product Details"
}
Finally! See how easy that was?
ZenRows offers a faster and more reliable method for accessing the data you need without being stopped by Cloudflare's protection measures. You might also want to see how to block resources in Playwright and scrape faster.
Conclusion
As you can see, it's possible to bypass Cloudflare using Playwright, but you may need to apply some advanced techniques, which won't necessarily get the job done. Meanwhile, ZenRows will give you immediate success, and you get a free API key now.
Did you find the content helpful? Spread the word and share it on Twitter, or LinkedIn.