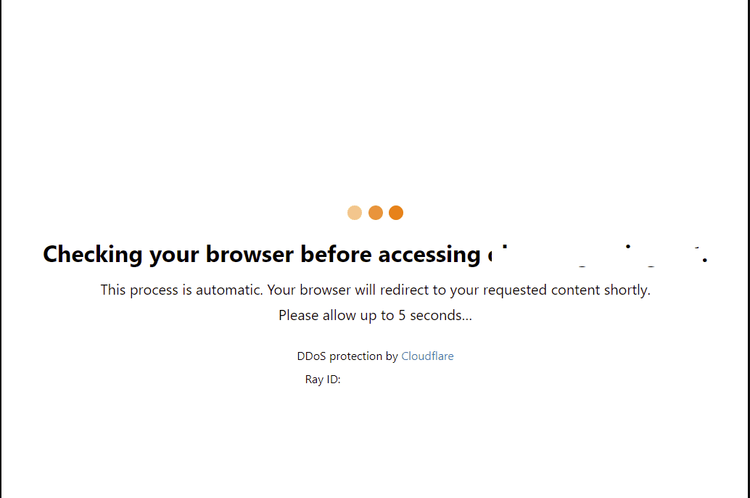
Cloudflare is a widely used web security and performance service. Its advanced anti-bot system uses high-level techniques to identify and block automated traffic, resulting in the "ACCESS DENIED" error message you may receive.
In this article, you'll learn how to bypass Cloudflare using Scrapy. Let's get started!
What Is Scrapy Cloudflare
Scrapy Cloudflare is a middleware package that integrates with the Scrapy web scraping tool to handle Cloudflare challenges for you by acting as an intermediary between your Scrapy spider and target servers. It intercepts and manipulates requests and responses at various stages of the scraping process.
By leveraging the middleware in your Scrapy project, you have an increased chance of avoiding detection and blocks.
How Scrapy Cloudflare Works
When a Scrapy spider starts crawling, it generates requests for predefined URLs. These requests pass through the middleware pipeline, where Scrapy Cloudflare can modify them to simulate human behavior.
This tool's main functionality is to bypass Cloudflare's "I'm Under Attack Mode" page. When the Cloudflare challenge server responds to the request, the Scrapy Cloudflare middleware intercepts the response and solves the JavaScript challenges.

How to Bypass Cloudflare with Scrapy
This tutorial will walk you through bypassing Cloudflare using Python and Scrapy. First, you need to add the middleware to your DOWNLOADER_MIDDLEWARES settings before making your requests. Here are the steps to take:
- Set up Scrapy.
- Install and integrate Scrapy Cloudflare.
1. Set Up Scrapy
Scrapy is an open-source framework that requires Python 3.6 or higher, so ensure it's installed. Then, install Scrapy with the following command in your terminal:
pip install scrapy
After that, navigate to your preferred directory and run the following command to create a new Scrapy project. Replace test_project with your project name.
scrapy startproject test_project
You'll get a response containing information about your new project and how to start a spider.

Navigate to your new project directory and start your first spider.
cd test_project
scrapy genspider (SpiderName) (TargetURL)
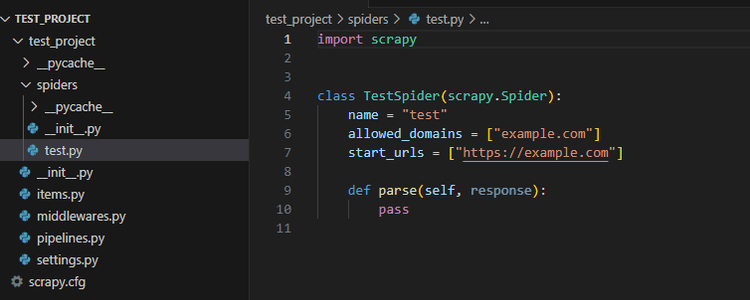
That generates a basic code template like the example below in the code editor.

2. Install and Integrate Scrapy Cloudflare Middleware
Run the following command to install Scrapy Cloudflare:
pip install scrapy_cloudflare_middleware
BoldAfter that, navigate to settings.py within your project folder, open it in a code editor, and locate the DOWNLOADER_MIDDLEWARES settings.

Uncomment the DOWNLOADER_MIDDLEWARES section by removing # at the beginning of each line. Then, add the Scrapy Cloudflare middleware:
DOWNLOADER_MIDDLEWARES = {
    "test_project.middlewares.TestProjectDownloaderMiddleware": 543,
    "scrapy_cloudflare_middleware.middlewares.CloudFlareMiddleware": 560,
}
The Scrapy Cloudflare middleware is assigned a priority value of 560 to ensure it's executed just before the Scrapy built-in RetryMiddleware.
Your editor should look like this:

Now that everything's set up, let's test our Scrapy spider against a Cloudflare-protected website: Astra.

To do that, in your test.py Spider, replace the example URL with https://www.getastra.com/. Then, print the response to verify it works.
Your complete code should look like this:
import scrapy


class TestSpider(scrapy.Spider):
    name = "test"
    allowed_domains = ["getastra.com"]
    start_urls = ["https://getastra.com"]

    def parse(self, response):
        print(response.text)
        pass
This should be your output:
//..
2023-06-21 00:52:15 [scrapy.core.engine] INFO: Spider opened
2023-06-21 00:52:15 [scrapy.extensions.logstats] INFO: Crawled 0 pages (at 0 pages/min), scraped 0 items (at 0 items/min)
2023-06-21 00:52:15 [test] INFO: Spider opened: test
2023-06-21 00:52:15 [scrapy.extensions.telnet] INFO: Telnet console listening on 127.0.0.1:6023
2023-06-21 00:52:16 [scrapy.downloadermiddlewares.redirect] DEBUG: Redirecting (302) to <GET https://www.getastra.com/> from <GET https://getastra.com>
2023-06-21 00:52:16 [scrapy.core.engine] DEBUG: Crawled (200) <GET https://www.getastra.com/> (referer: None)
<!DOCTYPE html><html data-wf-domain="astras-project.webflow.io" data-wf-page="64786632a27d03241167158c" data-wf-site="5f80230f2eb0ba0ee5a95589"><head><meta charset="utf-8" /><title>Astra Security - Comprehensive Suite Making Security Simple</title><meta content="Uncover vulnerabilities in your apps with our Pentest Suite. Protect your business in real time with Website Protection (Firewall & Malware Scanner)" name="description" /><meta content="Astra Security - Comprehensive Suite Making Security Simple" property="og:title" />
Awesome, you've won over Cloudflare detection!
However, the Scrapy Cloudflare middleware doesn't work on webpages that have higher-level security measures activated from the site firewall. For example, you'll get the following result when attempting to scrape G2:
//..
2023-06-02 00:34:04 [scrapy.core.engine] INFO: Spider opened
2023-06-02 00:34:04 [scrapy.extensions.logstats] INFO: Crawled 0 pages (at 0 pages/min), scraped 0 items (at 0 items/min)
2023-06-02 00:34:04 [test] INFO: Spider opened: test
2023-06-02 00:34:04 [scrapy.extensions.telnet] INFO: Telnet console listening on 127.0.0.1:6023
2023-06-02 00:34:06 [scrapy.downloadermiddlewares.redirect] DEBUG: Redirecting (301) to <GET https://www.g2.com/> from <GET https://g2.com>
2023-06-02 00:34:07 [scrapy.core.engine] DEBUG: Crawled (403) <GET https://www.g2.com/> (referer: None)
2023-06-02 00:34:07 [scrapy.spidermiddlewares.httperror] INFO: Ignoring response <403 https://www.g2.com/>: HTTP status code is not handled or not allowed
2023-06-02 00:34:07 [scrapy.core.engine] INFO: Closing spider (finished)
As you can see, our request was unsuccessful. We got a cloudfare 403 forbidden error, indicating access to our target website's resources is forbidden. That's because Cloudflare's challenges have evolved since the last time the Scrapy Cloudflare middleware was updated, and it's no longer a viable tool for bypassing Cloudflare on web pages with higher security enabled. But keep calm! The next section is about a working solution.
Best Scrapy Cloudflare Alternative
Fortunately, ZenRows is a more effective and scalable plugin for Scrapy, capable of bypassing all anti-bot challenges, and is frequently updated. Let's see it in action against G2! You'll retrieve your desired data by sending your target URLs to the ZenRows API endpoint.
First of all, sign up to get your free API key.
Then, create a function that generates the request that uses ZenRows as an intermediary. This function takes two arguments: your API key and the target URL. Additionally, it should include the necessary parameters: "Anti-bot", "Premium Proxy", and "JavaScript Rendering".
import scrapy
from urllib.parse import urlencode, quote

def get_zenrows_api_url(url, api_key):
    # Creates a ZenRows proxy URL for a given target_URL using the provided API key.
    payload = {
        'url': url,
        'js_render': 'true',
        'antibot': 'true',
        'premium_proxy': 'true'
    }

    api_url = f'https://api.zenrows.com/v1/?apikey={api_key}&{urlencode(payload)}'
    return api_url
Now, use this function in your spider to send a request to the ZenRows' API and extract your desired data. For this example, we'll print the page's title tag. So, your complete code will look like this:
import scrapy
from urllib.parse import urlencode, quote

def get_zenrows_api_url(url, api_key):
    # Creates a ZenRows proxy URL for a given target_URL using the provided API key.
    payload = {
        'url': url,
        'js_render': 'true',
        'antibot': 'true',
        'premium_proxy': 'true'
    }

    # Construct the API URL by appending the encoded payload to the base URL with the API key
    api_url = f'https://api.zenrows.com/v1/?apikey={api_key}&{urlencode(payload)}'
    return api_url

class TestSpider(scrapy.Spider):
    name = "test"

    def start_requests(self):
        urls = [
            'https://www.g2.com',
        ]
        api_key = 'Your_API_Key'
        for url in urls:
            # make a GET request using the ZenRows API URL
            api_url = get_zenrows_api_url(url, api_key)
            yield scrapy.Request(api_url, callback=self.parse)

    def parse(self, response):
        # Extract and print the title tag
        title = response.css('title::text').get()
        self.logger.info(f"Title: {title}")
Here's the result, which prints the title Business Software and Services Reviews | G2:
//..
2023-06-21 01:56:13 [scrapy.core.engine] INFO: Spider opened
2023-06-21 01:56:13 [scrapy.extensions.logstats] INFO: Crawled 0 pages (at 0 pages/min), scraped 0 items (at 0 items/min)
2023-06-21 01:56:13 [test] INFO: Spider opened: test
2023-06-21 01:56:13 [scrapy.extensions.telnet] INFO: Telnet console listening on 127.0.0.1:6023
2023-06-21 01:56:30 [scrapy.core.engine] DEBUG: Crawled (200) <GET https://api.zenrows.com/v1/?apikey=YOUR_API_KEY&url=https%3A%2F%2Fwww.g2.com&js_render=true&antibot=true&premium_proxy=true> (referer: None)
2023-06-21 01:56:30 [test] INFO: Title: Business Software and Services Reviews | G2
2023-06-21 01:56:30 [scrapy.core.engine] INFO: Closing spider (finished)
Awesome, right? Integrating ZenRows with Scrapy makes bypassing Cloudflare really easy.
Conclusion
The Python Scrapy Cloudflare middleware relied on Cloudflare just checking if the web client supports JavaScript. However, the security system constantly updates its measures, and Scrapy Cloudflare no longer works as before.
Fortunately, ZenRows is a complement to Scrapy that offers a trial-and-tested path to avoid getting blocked. Sign up now to get 1,000 free API credits for your project.
Did you find the content helpful? Spread the word and share it on Twitter, or LinkedIn.