With anti-bot measures becoming more popular and trickier, your scraper is bound to encounter the Access denied error message. However, hiding your original IP through a proxy will help you overcome those challenges.
You'll learn everything you need to know about setting a Scrapy proxy in this step-by-step tutorial.
Let's get started!
Prerequisites
Scrapy requires Python 3.6 or higher, so ensure you have it installed. Then, install Scrapy by typing pip install scrapy in your terminal or command prompt.
Scrapy installation requires twisted-iocpsupport, but it's not supported on Python's latest version (3.11.2). So, consider staying within 3.6 and 3.10 if you get related errors.
Once installed, it's time to create a new Scrapy project. For that, navigate to the directory you want to store it in and run the following command replacing (ProjectName) with the name you want.
scrapy startproject (ProjectName)
Navigate to the project directory and create your spider, a Scrapy component for retrieving data from a target website. It takes in two arguments: name and target URL.
cd (ProjectName)
scrapy genspider (SpiderName) (TargetURL)
Suppose you want to scrape the URL https://www.example.com. Then you need to create a spider with the name scraper with the following command.
scrapy genspider scraper https://www.example.com
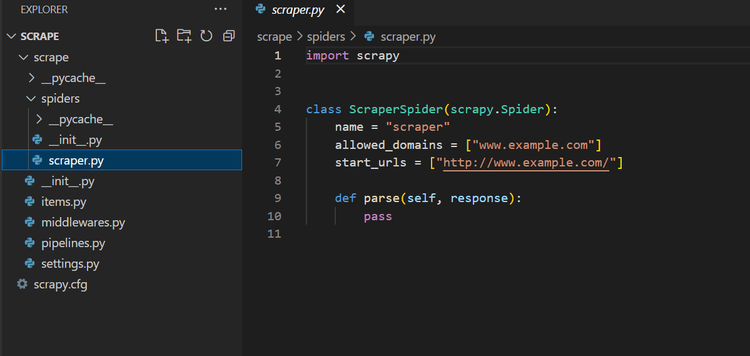
That'll generate a basic code template and, when you open your spider, it should look like this:

While Scrapy supports HTTP and HTTPS proxies, SOCKS support may be absent. The open GitHub issue since 2014 provides more information on this matter. If you want to use SOCKS proxies, you can explore the solutions to this issue.
How to Set up a Proxy with Scrapy
You can set up a Scrapy proxy by adding a meta parameter or creating a custom middleware. Let's explore the two approaches.
Method 1: Add a Meta Parameter
This method involves passing your proxy credentials as a meta parameter in the scrapy.Request() method.
Once you have your proxy address and port number, pass them into your Scrapy request using the following syntax.
yield scrapy.Request(
	url,
	callback=self.parse,
	meta={'proxy': 'http://proxy_address:port'}
	)
Here's what you get by updating your spider:
import scrapy


class ScraperSpider(scrapy.Spider):
    name = "scraper"
    allowed_domains = ["www.example.com"]
    start_urls = ["http://www.example.com/"]
    for url in start_urls:
        yield scrapy.Request(
                url=url,
                callback=self.parse,
                meta={"proxy": "http://proxy_address:port"},
            )

    def parse(self, response):
        pass
Now, replace http://proxy_address:port with your proxy credentials. You can use free online proxy providers such as ProxyNova and FreeProxyList.
Method 2: Create a Custom Middleware
The Scrapy middleware is an intermediary layer that intercepts requests. Once you specify a middleware, every request will be automatically routed through it.
This is a great tool for projects involving multiple spiders, as it lets you manipulate proxy credentials without editing or changing your actual code.
Create your custom middleware by extending the proxyMiddleware class and adding it to the settings.py file. Here's an example:
class CustomProxyMiddleware(object):
    def __init__(self):
        self.proxy = 'http://proxy_address:port'

    def process_request(self, request, spider):
        if 'proxy' not in request.meta:
            request.meta['proxy'] = self.proxy

    def get_proxy(self):
        return self.proxy
Then, add your middleware to the DOWNLOADER_MIDDLEWARE settings in your settings.py file.
DOWNLOADER_MIDDLEWARES = {
    'myproject.middlewares.CustomProxyMiddleware': 350,
}
You can also add middleware at the spider level using custom settings, and your code would look like this:
import scrapy


class ScraperSpider(scrapy.Spider):
    name = "scraper"
    custom_settings = {
        'DOWNLOADER_MIDDLEWARES': {
            'myproject.middlewares.CustomProxyMiddleware': 350,
        },
    }

    def parse(self, response):
        pass
Note that myproject.middlewares in the code samples above stands for the full module path to the middleware class. In other words, the CustomProxyMiddleware class is defined in a file called middlewares.py in a Scrapy project named myproject.
The integer in the code above is an order number that specifies the chain of middleware execution. An order number of 350 means your custom middleware will run after middleware with lower order numbers.
Both the meta parameter and middleware approaches can bring the same results. We'll focus on the second in this tutorial, as it provides more control and makes it easier to manage proxy endpoints.
You can leverage ready-to-use middleware packages. There's no need to reinvent the wheel.
How to Use Rotating Proxies with Scrapy
Unfortunately, you can still get blocked using the same proxy, especially if you make too many requests. That's because websites flag excessive requests from a single IP address as suspicious and block or ban the culprit.
However, you can avoid IP bans and bypass anti-bots like Cloudflare in Scrapy. That involves distributing requests to random IPs from a pool of available proxies to reduce your chances of being detected.
So, how do you rotate proxies with Scrapy? Let's see!
Ready-to-use Scrapy Proxy Middleware
One option is via a ready-to-use Scrapy middleware that will take care of the rotation while ensuring you're using active proxies.
You can use any of the numerous free providers, including scrapy-proxies, scrapy-rotating-proxies, and scrapy-proxy-pool. To use these solutions, install and enable the free middleware. Then add your proxy list to the settings.py file.
Let's see scrapy-rotating-proxies in action!
Use the following command to install it:
pip install scrapy-rotating-proxies
Next, enable its middleware by adding it to the DOWNLOADER_MIDDLEWARE settings in the settings.py file.
DOWNLOADER_MIDDLEWARES = {
    'scrapy_rotating_proxies.middlewares.RotatingProxyMiddleware': 350,
    'scrapy.downloadermiddlewares.httpproxy.HttpProxyMiddleware': 400,
}
In the code above, we set a 350 order number for the RotatingProxyMiddleware, while the built-in HttpProxyMiddleware is given 400. That ensures the former runs first so it can switch proxies accordingly. The numbers are arbitrary and can be replaced with unique integers.
Now it's time to create a file with your proxies, one per line, with the format protocol://ip: port. protocol refers to HTTP or HTTPS, and IP: port are your proxy credentials.
To finish, specify your path to the proxy file using the ROTATING_PROXY_LIST_PATH option.
ROTATING_PROXY_LIST_PATH = 'proxy_list.txt'
To test your Scrapy rotating proxy, let's scrape httpbin, ident.me, and api.ipify. These websites log the client's IP address so, if you do everything correctly, your spider will return a different proxy address with each request.
For this example, update your scraper-spider like this:
import scrapy

class ScraperSpider(scrapy.Spider):
    name = "scraper"

    def start_requests(self):
        urls = [
            'https://httpbin.org/ip',
            'http://ident.me/',
			'https://api.ipify.org?format=json',
        ]
        for url in urls:
            yield scrapy.Request(url=url, callback=self.parse)

    def parse(self, response):
        self.logger.info('IP address: %s' % response.text)
Also, use the following IPs as your proxy list:
{
https://23.95.94.41:3128,
https://82.146.48.200:8000,
https://83.171.248.156:3128
	}
The result looks like this:
{ origin: "23.95.94.41"}
83.171.248.156
{ ip: "82.146.48.200"}
Congratulations! You can now set up a Scrapy proxy and rotate multiple ones to avoid getting blocked.
But free proxies are unreliable and get blocked most of the time, so using a premium web scraping proxy is best. Let's see an example!
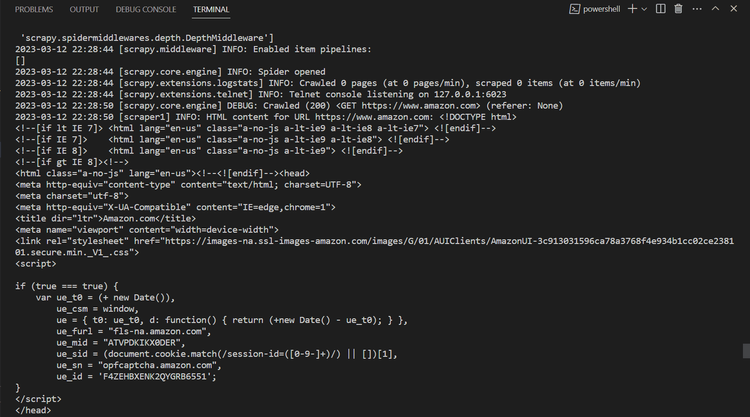
Replacing the test target URLs above with an actual website, say Amazon, yields the result below, proving free proxies won't work.

We'll solve this in the next section.
Best Scrapy Proxy Tool to Avoid Getting Blocked
Premium proxies used to be expensive, especially for large-scale scraping, but now you can find excellent and affordable solutions.
One of the best examples is ZenRows. It offers numerous perks, including proxy rotation and geo-location, and its flexible pricing plans start as low as $49 monthly.
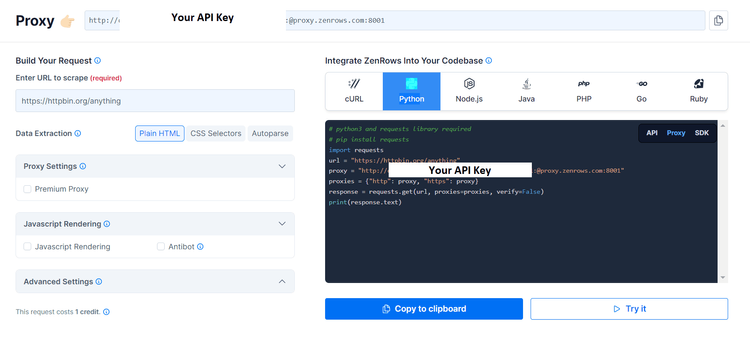
To use ZenRows, sign up, and you'll get your API key with 1,000 free proxy requests.

Let's see how to use ZenRows with Scrapy to count on a premium rotating proxy service.
Method 1: Send URLs to the ZenRows API Endpoint
To do this, create a function that returns the ZenRows' proxy URL. It takes in two arguments: your API key and the target URL. Additionally, import the urlencode function from the urllib.parse module to encode the URL.
import scrapy
from urllib.parse import urlencode

def get_zenrows_proxy_url(url, api_key):

    #Creates a ZenRows proxy URL for a given target_URL using the provided API key.

    payload = {'url': url}
    proxy_url = f'http://api.zenrows.com/v1/?apikey={api_key}&{urlencode(payload)}'
    return proxy_url
The code above uses a payload that links with the ZenRows proxy URL format and returns the proxy_url.
Let's use this function in a Scrapy spider.
First, define your target URL and add your API key.
class MySpider(scrapy.Spider):
    name = 'myspider'

    def start_requests(self):
        urls = [
            'http://www.amazon.com',
        ]
        api_key = 'YOUR_API_KEY'
        for url in urls:
            proxy_url = get_zenrows_proxy_url(url, api_key)
            yield scrapy.Request(proxy_url, callback=self.parse)

    def parse(self, response):
        # parse the response as needed
        self.logger.info(f"HTML content for URL {response.url}: {response.text}")
Next, put everything together. The complete code should look like this:
import scrapy
from urllib.parse import urlencode

def get_zenrows_proxy_url(url, api_key):

    #Creates a ZenRows proxy URL for a given target_URL using the provided API key.

    payload = {'url': url}
    proxy_url = f'http://api.zenrows.com/v1/?apikey={api_key}&{urlencode(payload)}'
    return proxy_url


class MySpider(scrapy.Spider):
    name = 'myspider'

    def start_requests(self):
        urls = [
            'https://www.amazon.com',
        ]
        api_key = 'API_Key'
        for url in urls:
            proxy_url = get_zenrows_proxy_url(url, api_key)
            yield scrapy.Request(proxy_url, callback=self.parse)

    def parse(self, response):
        # parse the response as needed
        self.logger.info(f"HTML content for URL {response.url}: {response.text}")
This should be the result:

Awesome, right?
Method 2: Pass Your ZenRows Credentials as a Meta Parameter
This approach is similar to what we discussed earlier. All you need to do is pass your proxy details in the meta field of every request.
That is how your code should look:
import scrapy


class ScraperSpider(scrapy.Spider):
    name = "scraper"

    start_urls = ["https://www.amazon.com"]

    def start_requests(self):
        for url in self.start_urls:
            yield scrapy.Request(
                url=url,
                callback=self.parse,
                meta={"proxy": "http://{YOUR_API_KEY}:@proxy.zenrows.com:8001"},
            )

    def parse(self, response):
        self.logger.info(f"HTML content for URL {response.url}: {response.text}")
You should get the same result as in the previous method.
Conclusion
For any data extraction project, you'll need to get around detection mechanisms, and a Scrapy proxy plays a key role. By routing your requests through it, you can hide your IP address and avoid getting blocked.
Now, you know how to set it up and use it effectively with Scrapy in Python. However, as free proxies are often unreliable, you might need to consider a premium solution like ZenRows. Use the free trial to test it for your next Scrapy project.
Frequent Questions
What Is a Proxy for Scrapy?
A proxy for Scrapy is a server that intercepts requests between Scrapy and the website being scraped. The library makes a request to the proxy server, which then relays the request to the website.
How Do I Use a Proxy in a Scrapy Request?
You can use a proxy in Scrapy request by passing in your proxy credentials (IP, port, and authentication details) as a meta parameter in the Scrapy.Request() method.
What Is IP Rotation with Scrapy?
IP rotation with Scrapy involves switching between IP addresses from a pool of proxy servers to make each request using Scrapy.
How Do You Integrate a Proxy in Scrapy?
You can integrate a proxy in Scrapy either by passing the proxy credentials as a meta parameter or creating a custom middleware. The second one is more recommended because it gives you more control.
How to Set Up a Proxy for Scrapy?
To set up a proxy for Scrapy, you can pass the proxy details as a meta parameter in the request object, create a custom middleware, or use a free middleware service.
How to Rotate a Proxy in Scrapy?
To rotate a proxy in Scrapy, you can implement a custom middleware that takes a list of proxies and cycles through them for each request.
Did you find the content helpful? Spread the word and share it on Twitter, or LinkedIn.